Editing the Contact Page
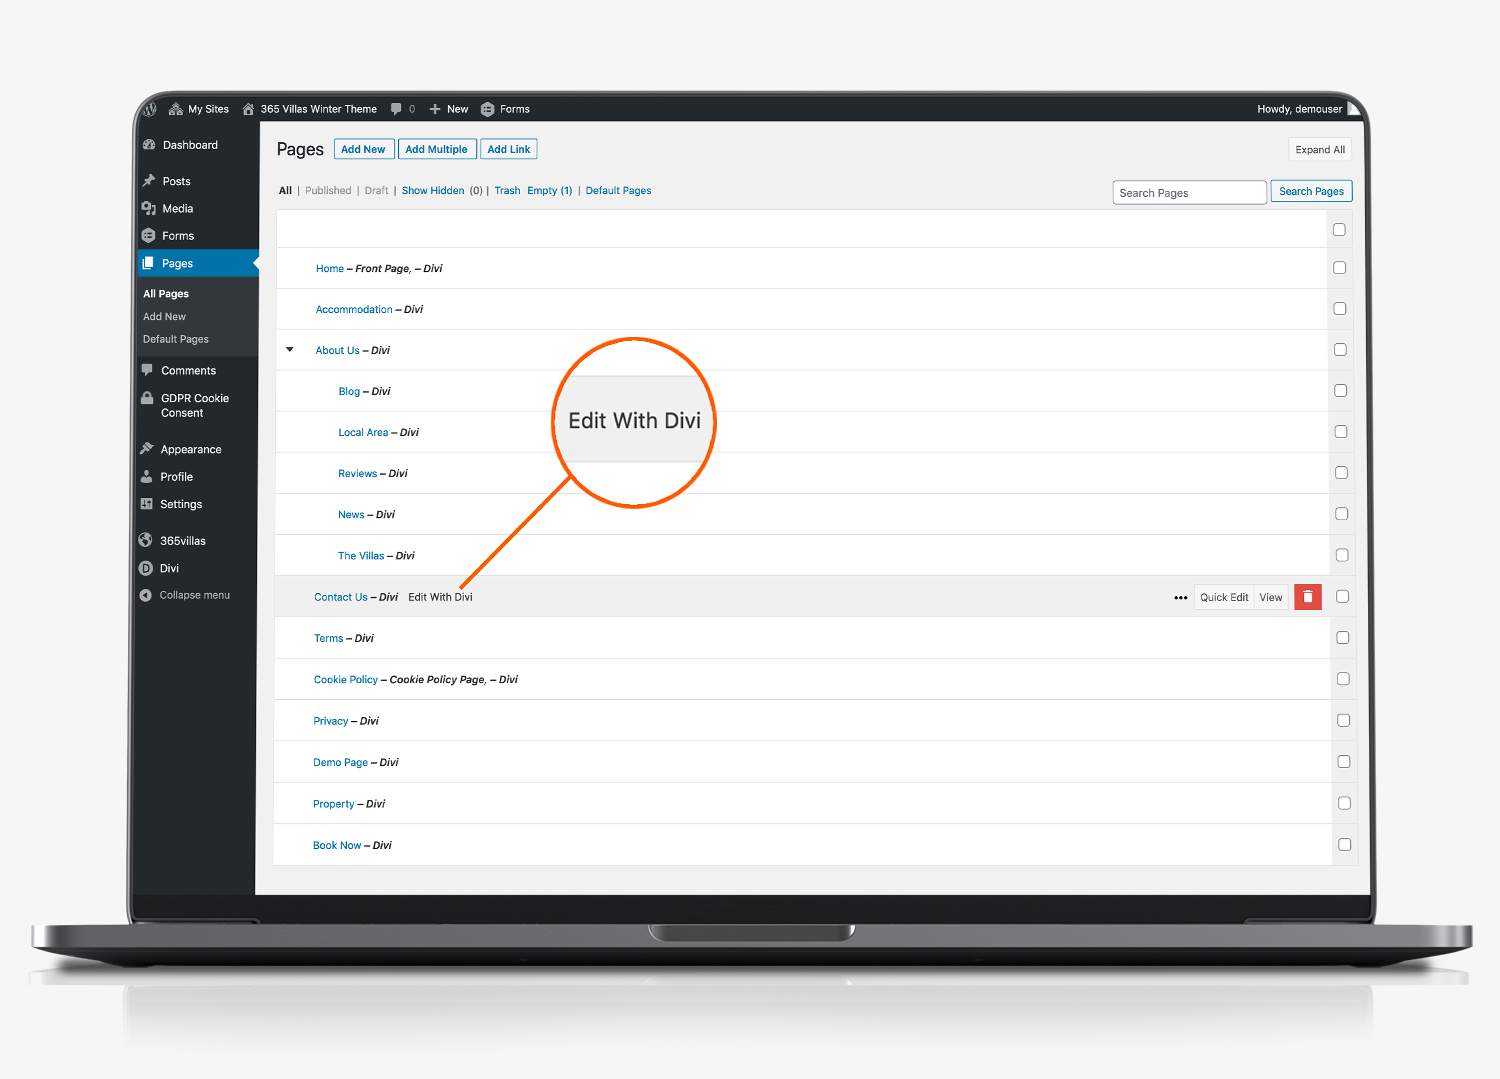
Start by selecting the contact page from the ‘Pages’ link in the side menu of your content management system. Click edit with Divi.

The contact us page comprises the following elements:
- The page banner and title
- Your address and contact details
- Tour contact introductory paragraph
- The contact form
Editing Content
If you haven’t already seen it. There are detailed instructions about how to edit a page here. We suggest that you read this first. This provides detailed instructions about how to edit the page banner and text elements of the page.
Editing Social Media

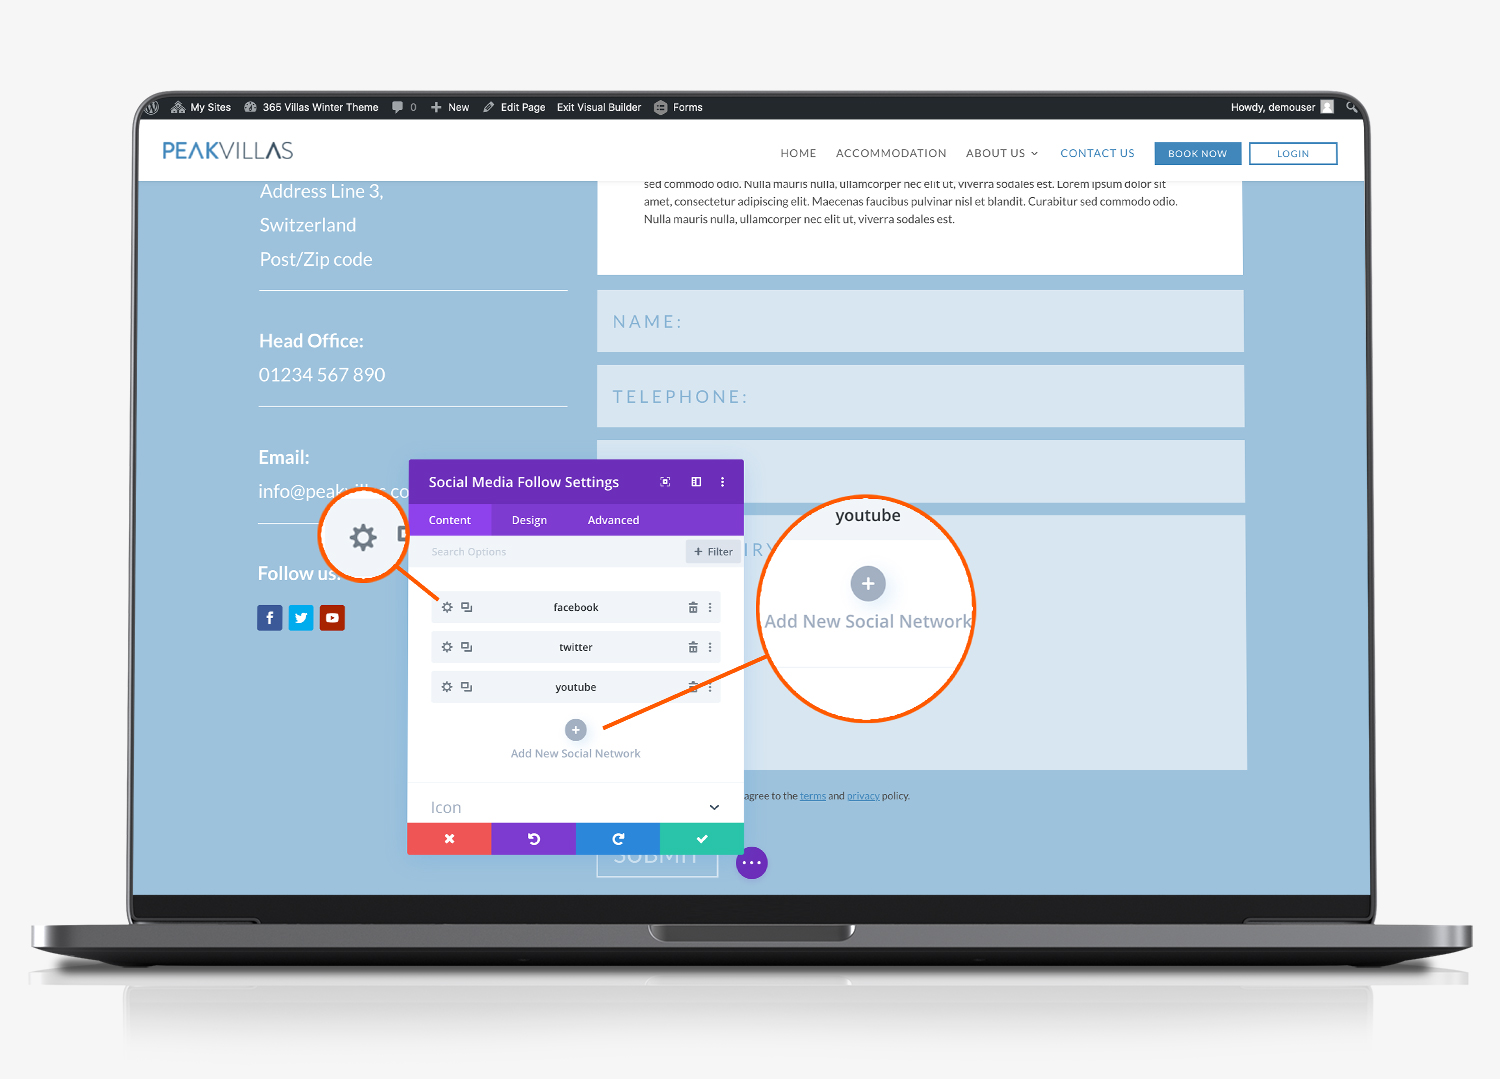
To update the links to your social media accounts, start by hovering your mouse over the icons and click the black gear icon to launch the ‘social media follow settings’ module editor.
- Select the gear icon next to the social media network you want to edit.
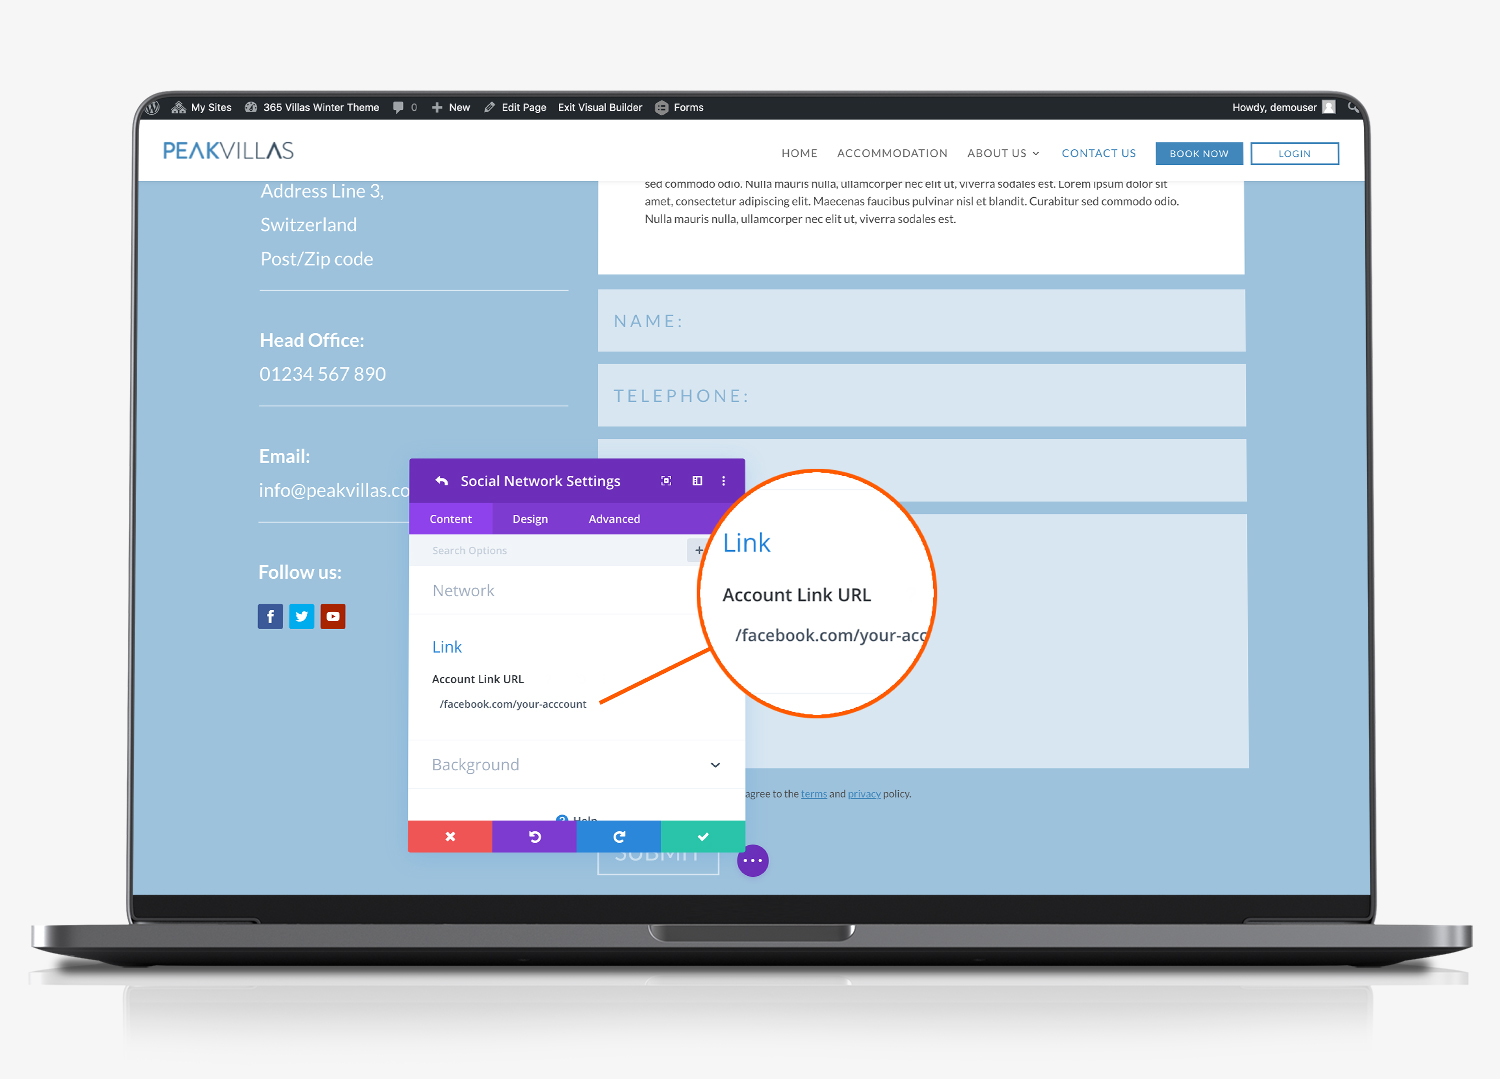
- Expand the ‘link’ section and paste the full url for your social media page into the ‘Account Link URL’ field.

3. Click the green tick to confirm the change, which returns you to the list of social media networks.
4. Click the next network you want to edit and repeat the instructions above.
5. If you want to add a new social network, click the ‘+’ icon and select from the list.
6. Click save (expand the purple circle at the footer of the page and click save).
Form Text Editing
The contact us form, and associated settings are managed under the ‘forms’ section from the left menu in your content management system. From here you can edit the fields included within your contact form, the settings of the form and the notification emails that are sent to you, when someone completes the form.
In addition, you can change the background colour of the input fields by editing the custom CSS that has been applied to the form. To do this:
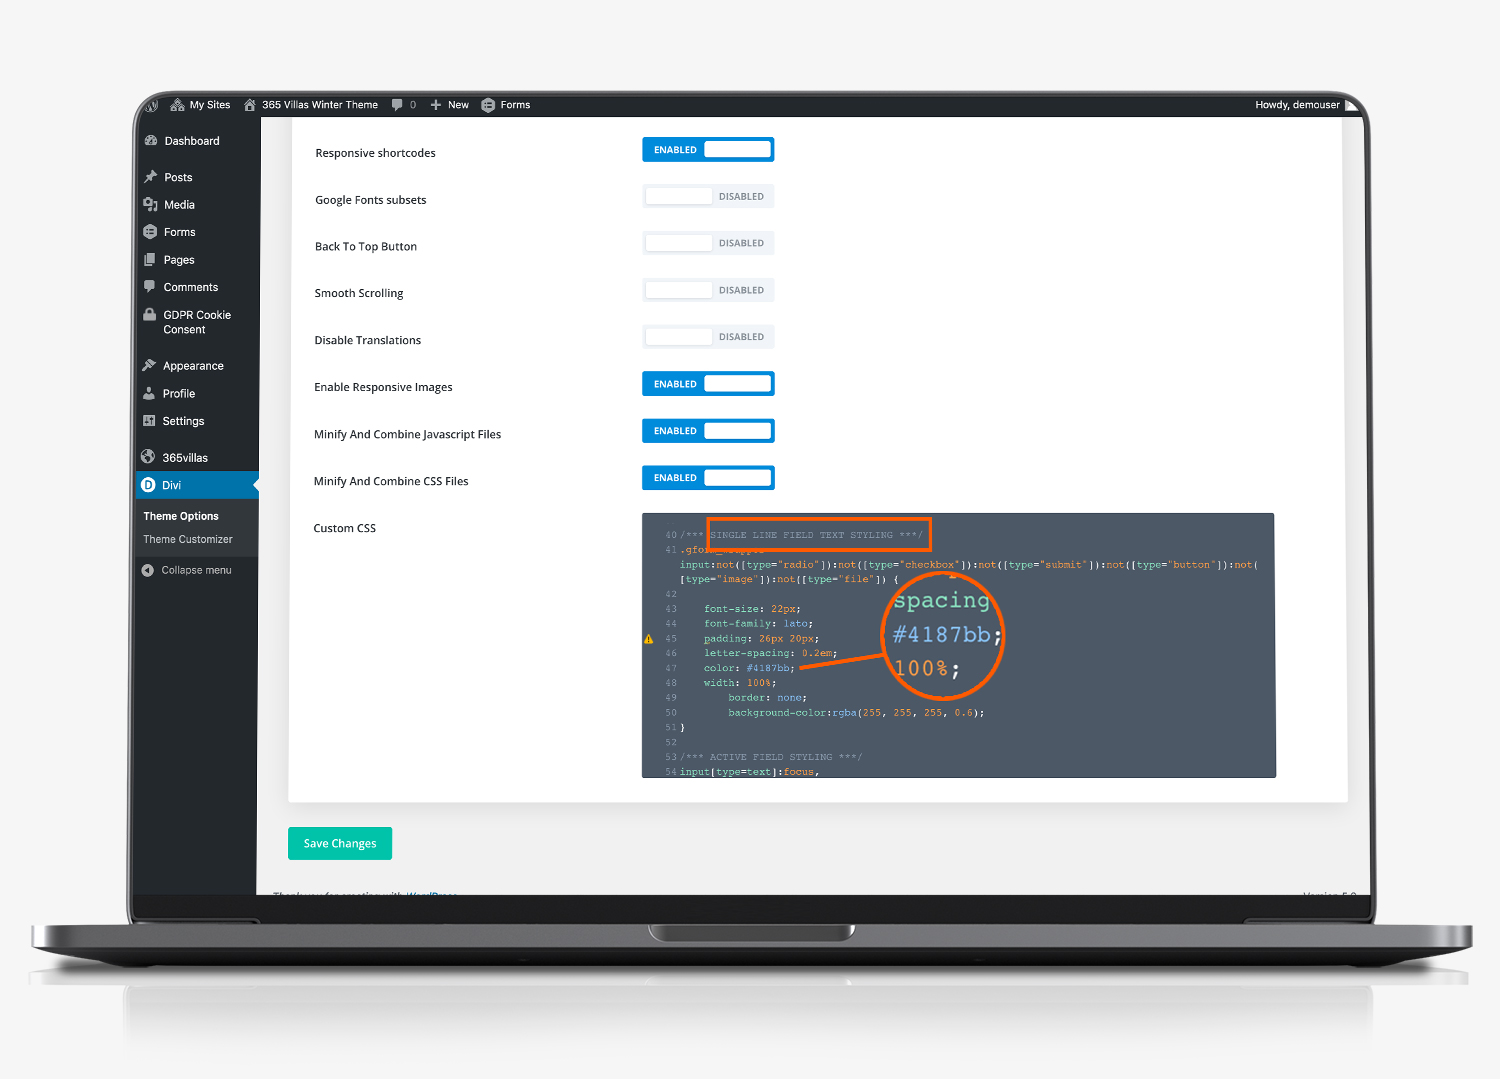
- Click on DIVI (from the main left menu in your content management system
- Under the ‘General’ tab, scroll down the page until you see the ‘Custom CSS’ box.
- The text box styling is managed from line 40. Scroll to line 47 and you will see the colour that has been applied to the ext in the input fields. The default is #4187bb. You can change this value to the colour that you want to use, by overwriting this value. To read more about HTML color codes click here.
- The background colour of the field can also be changed by editing the RGB colours on line 56
- There are separate settings for the active version of the form. At line 58 you can set the background colour of the form, so that it changes when someone is typing into the field. The default colour is: rgba(255, 255, 255, 1). You can read more about rgba colors here.

Now do the same for Enquiry Field
The enquiry field is a text area (as opposed to a text line) and is styled separately.
- This time scroll to line 69 and change the HTML colour reference. The default is #4187bb
- And scroll to line 70 to set the rgba background colour
- The active colour is inherited from line 58 as above.

