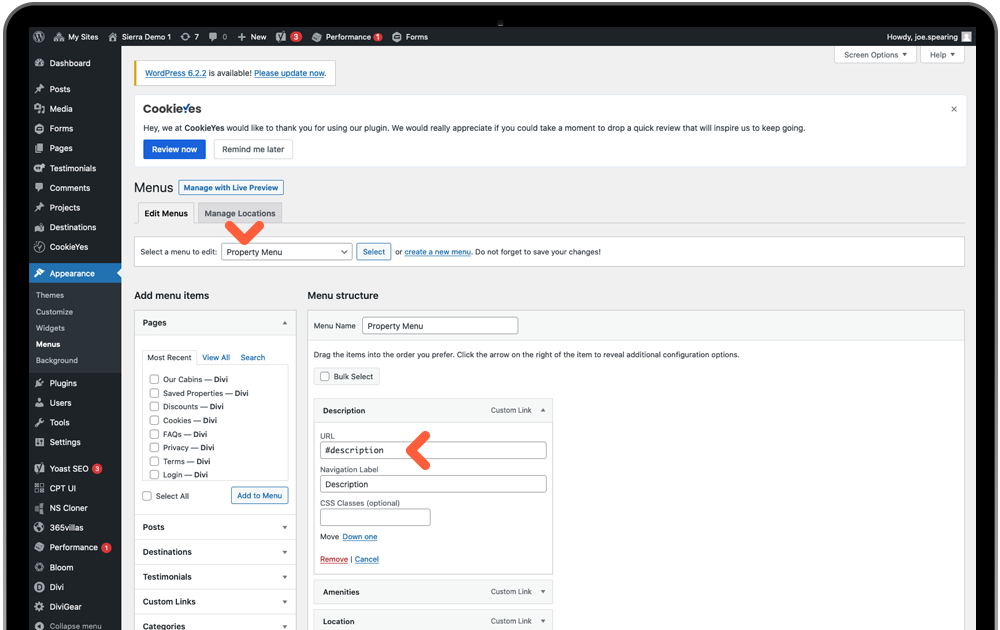
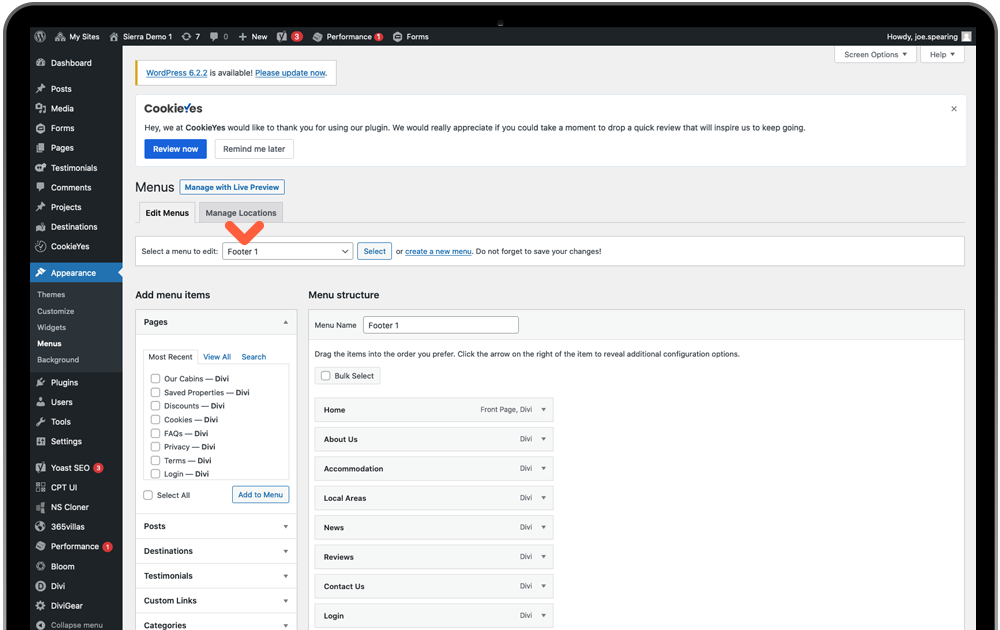
There are 3 locations for menus in Sierra. The Primary Main Header, Footer Column Menus and Property Details Menu. Go to Appearance Menu > Menus > Select a menu to edit (dropdown) > Select Button:
Primary Header (Main Menu)
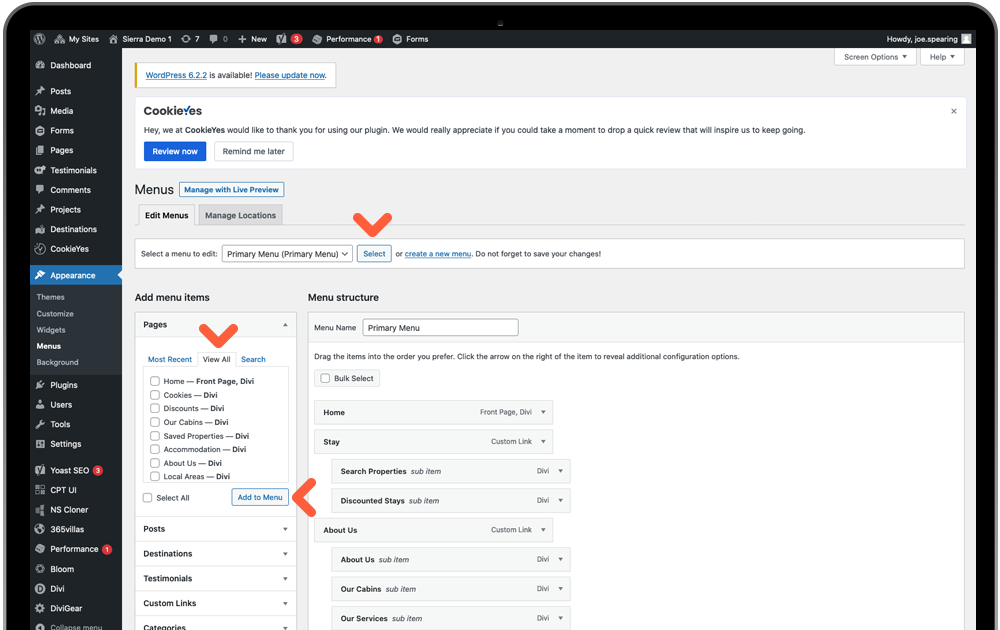
There is little to do here unless you wish to add new or remove pages. To add new pages you have created, select the View All tab for the full page list then check the boxes of your new pages, click Add to Menu. This will please your new page(s) bar to the bottom of the structure and you should drag your page in to the desired position in the menu. Indented bars are sub-pages to the page above it.
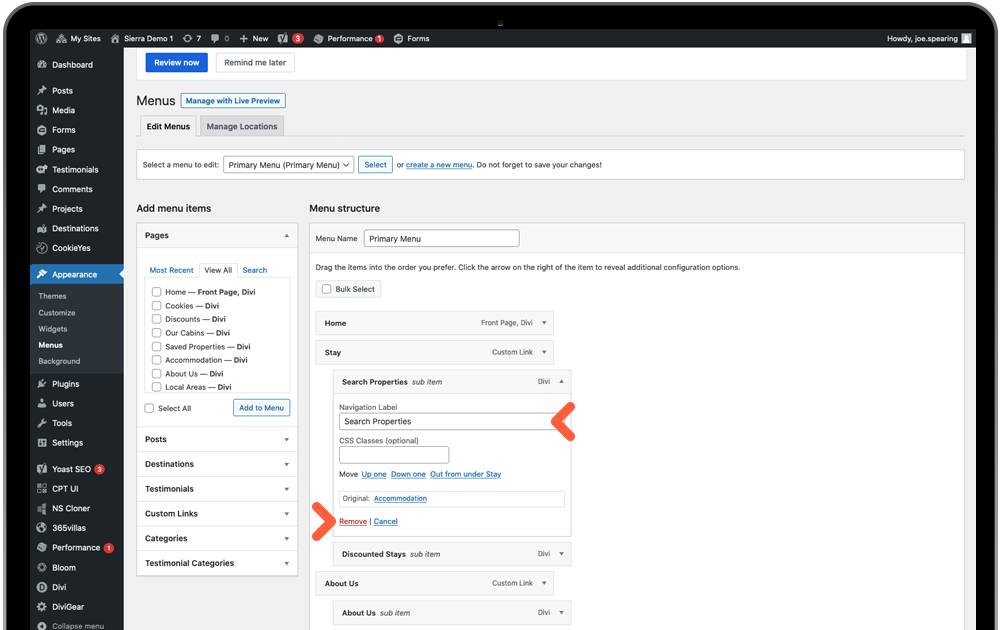
You can rename the Navigation Label of your pages in the text field above but this will not update the page url (permalink) – if you wish to, you need to visit the page settings instead. Click Remove link to delete any pages from your menu.
Header CTA Menu
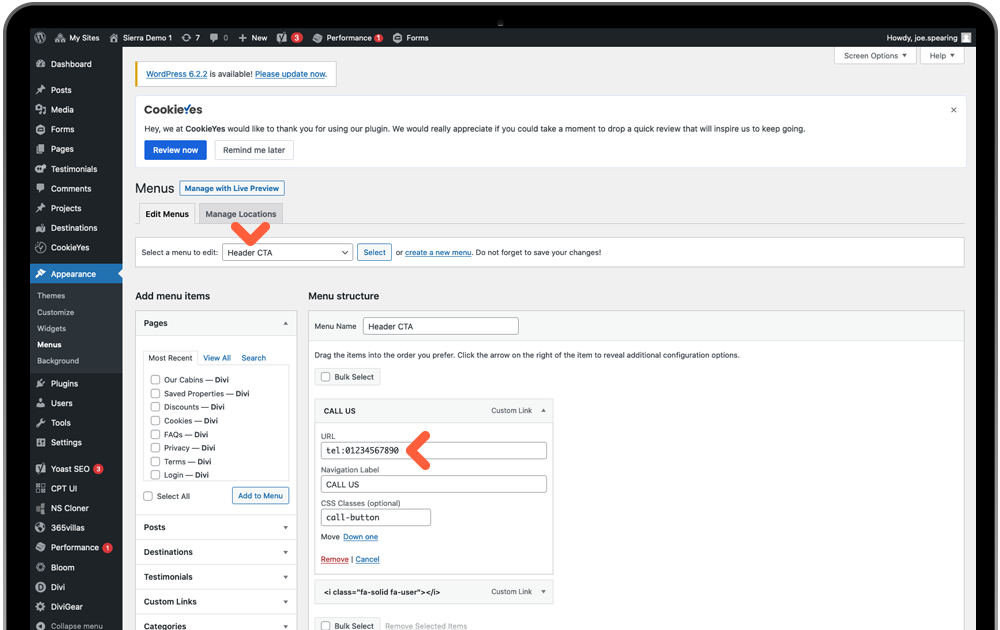
The ‘Call us’ button link and login icon are treated as a seperate menu in the corner of your header. For this the only update required is to insert your telephone number link. Click the Call US menu dropdown in the Menu Structure and replace the default number in the URL field – keeping the text ‘tel:’ before so a web browser knows it’s a telephone link.
Remember to Save Menu before exiting.
Footer Menu 1 & 2
The footer menu is essentially split in to 2 different menus, one for each footer column. Select each from the top dropdown and if you wish to add, swap, remove or re-arrange them, use the same method as above for the Main Menu.
Property Menu (Property Focus Page)
This menu works as an anchor menu for the information sections on individual property pages. We have inserted anchor links to help the user scroll to desired sections. No changes needed here unless you wish to remove any.
