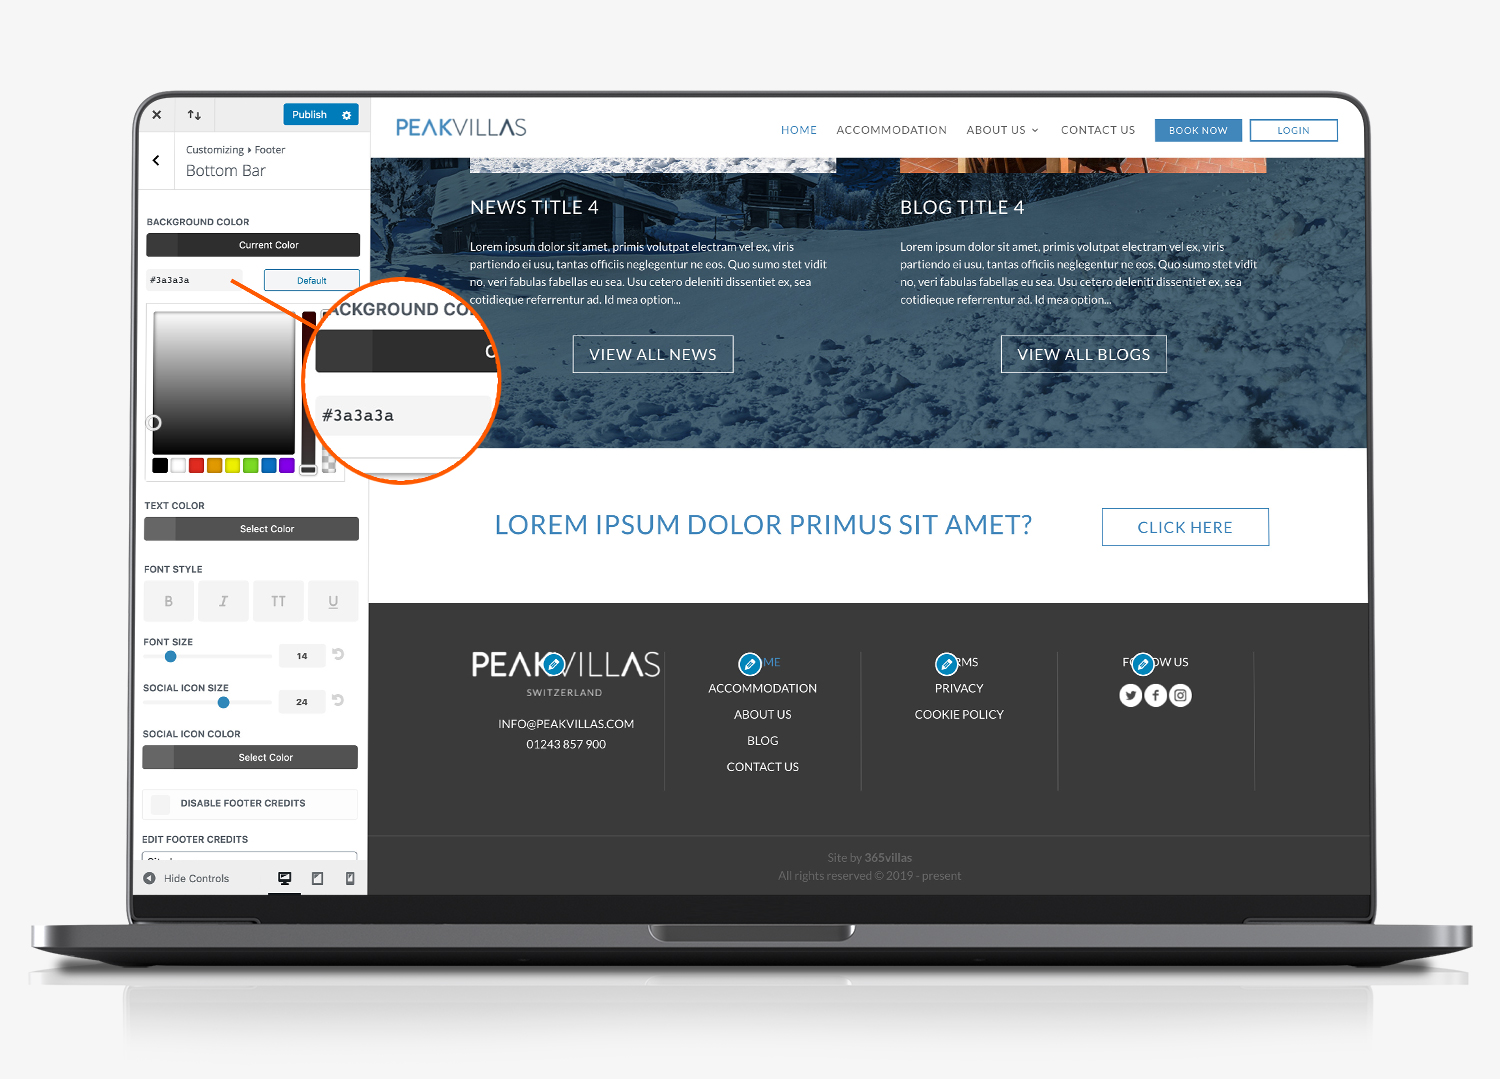
Footer Overview
The footer section of your website includes the following elements:
- Column 1 comprising a logo, email and telephone number
- Column 2 which features a selection of menu navigation links
- Column 3 which includes menu links to your terms, orivacy and cookie policy pages
- Column 4 which includes icons and links to your social media networks.
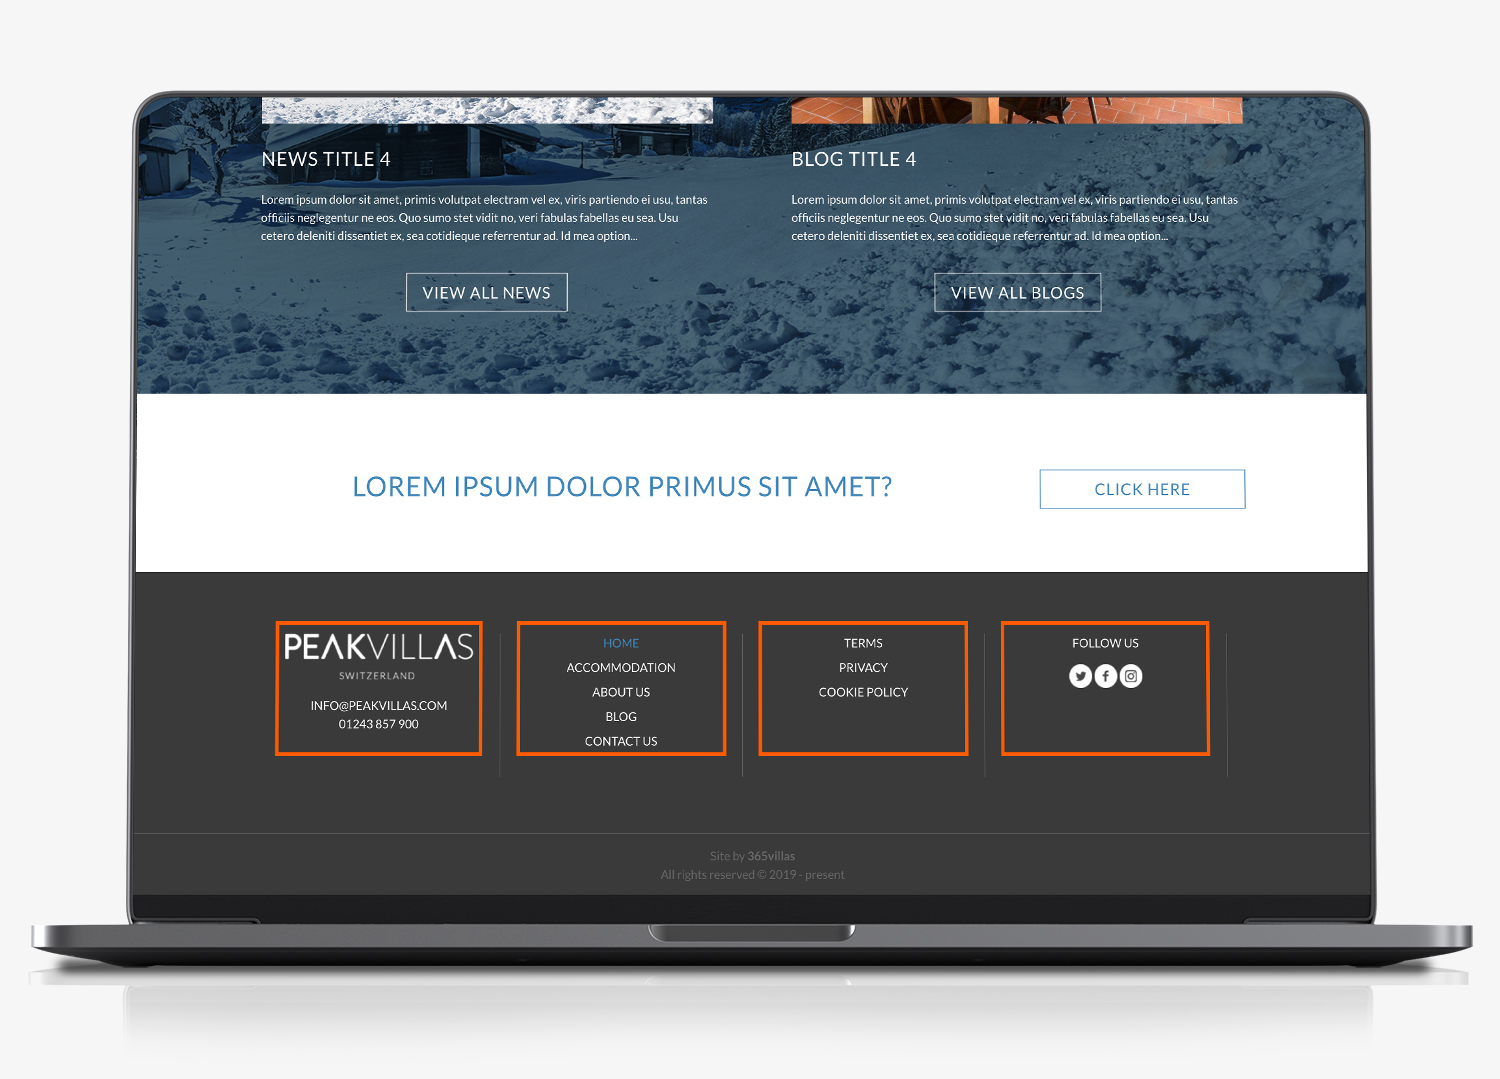
These columns are managed within the ‘widgets’ section of the content management section of your website.
Footer Widgets
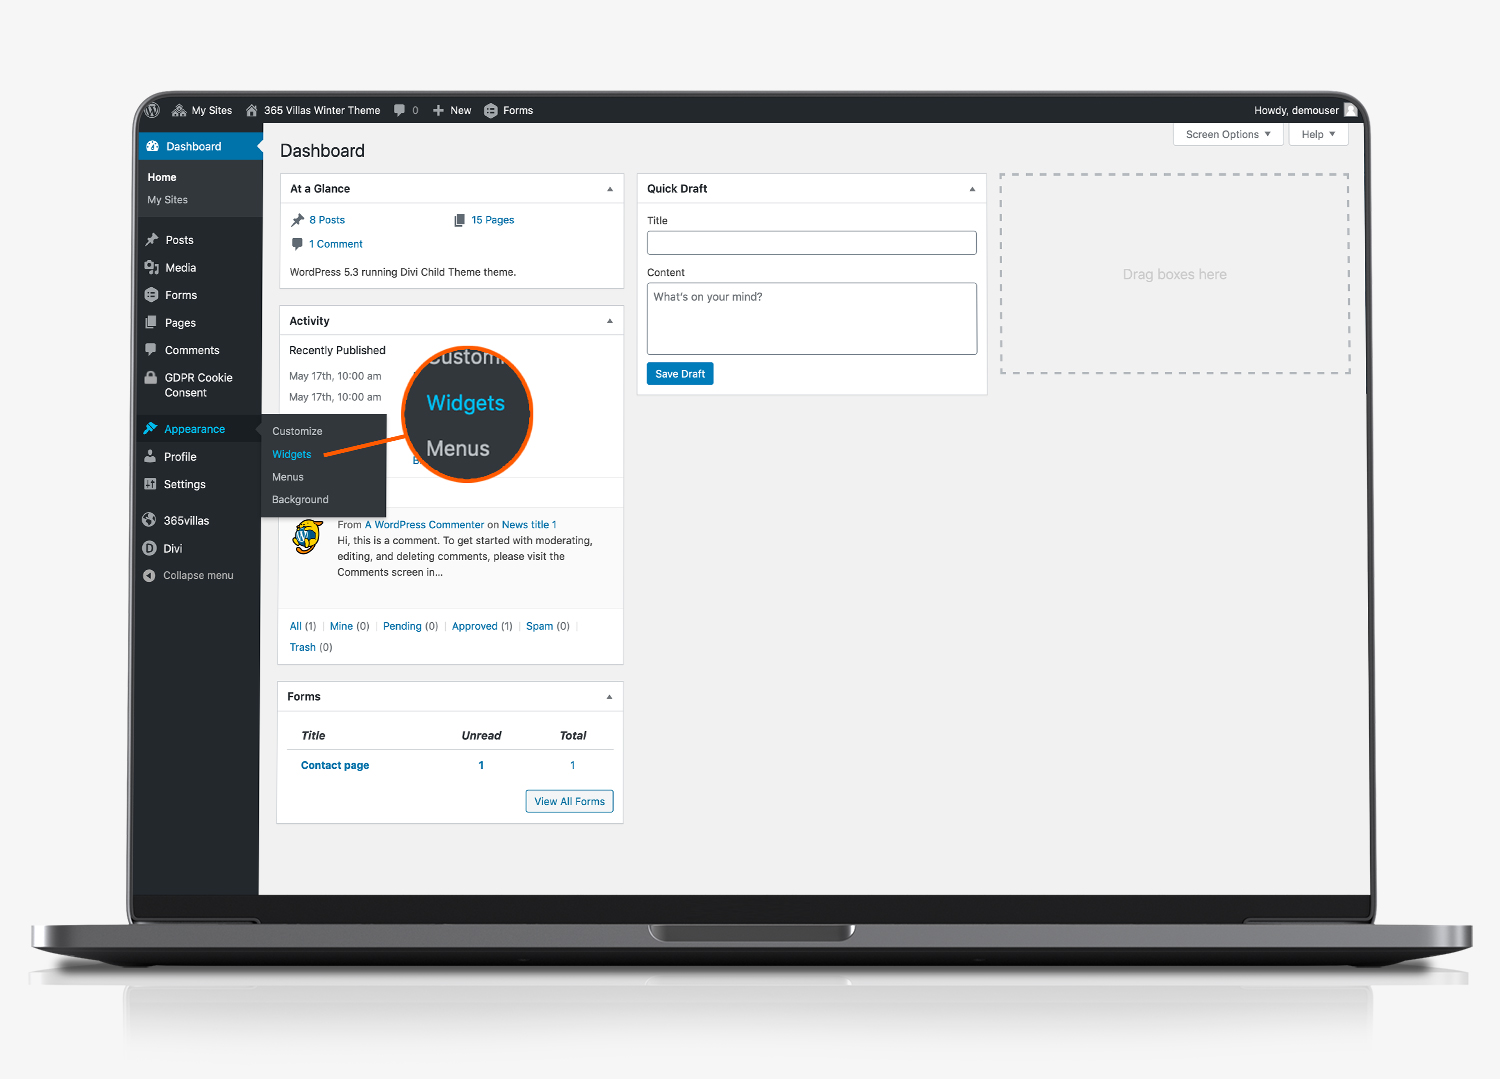
- Click appearance
- Click widgets
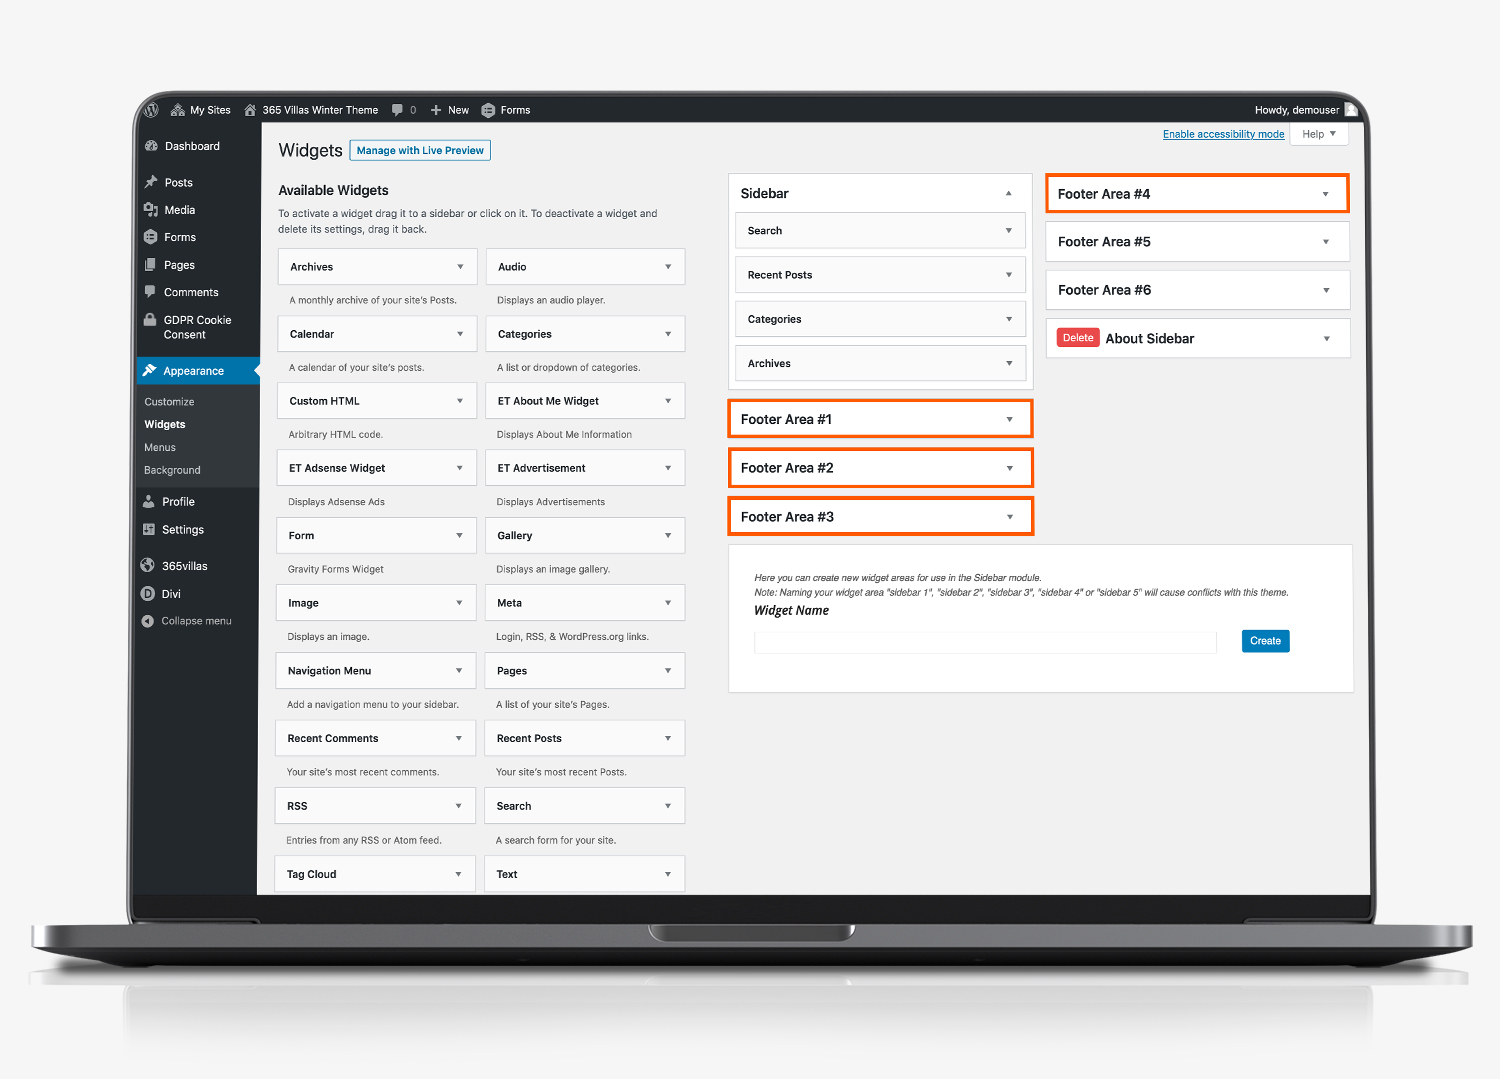
Footer Areas
Within the ‘widgets’ section you will see all four columns labelled Footer Area #1 to #4. Click the arrow to expand each section.
Footer Area #1 – Logo & Contact Details
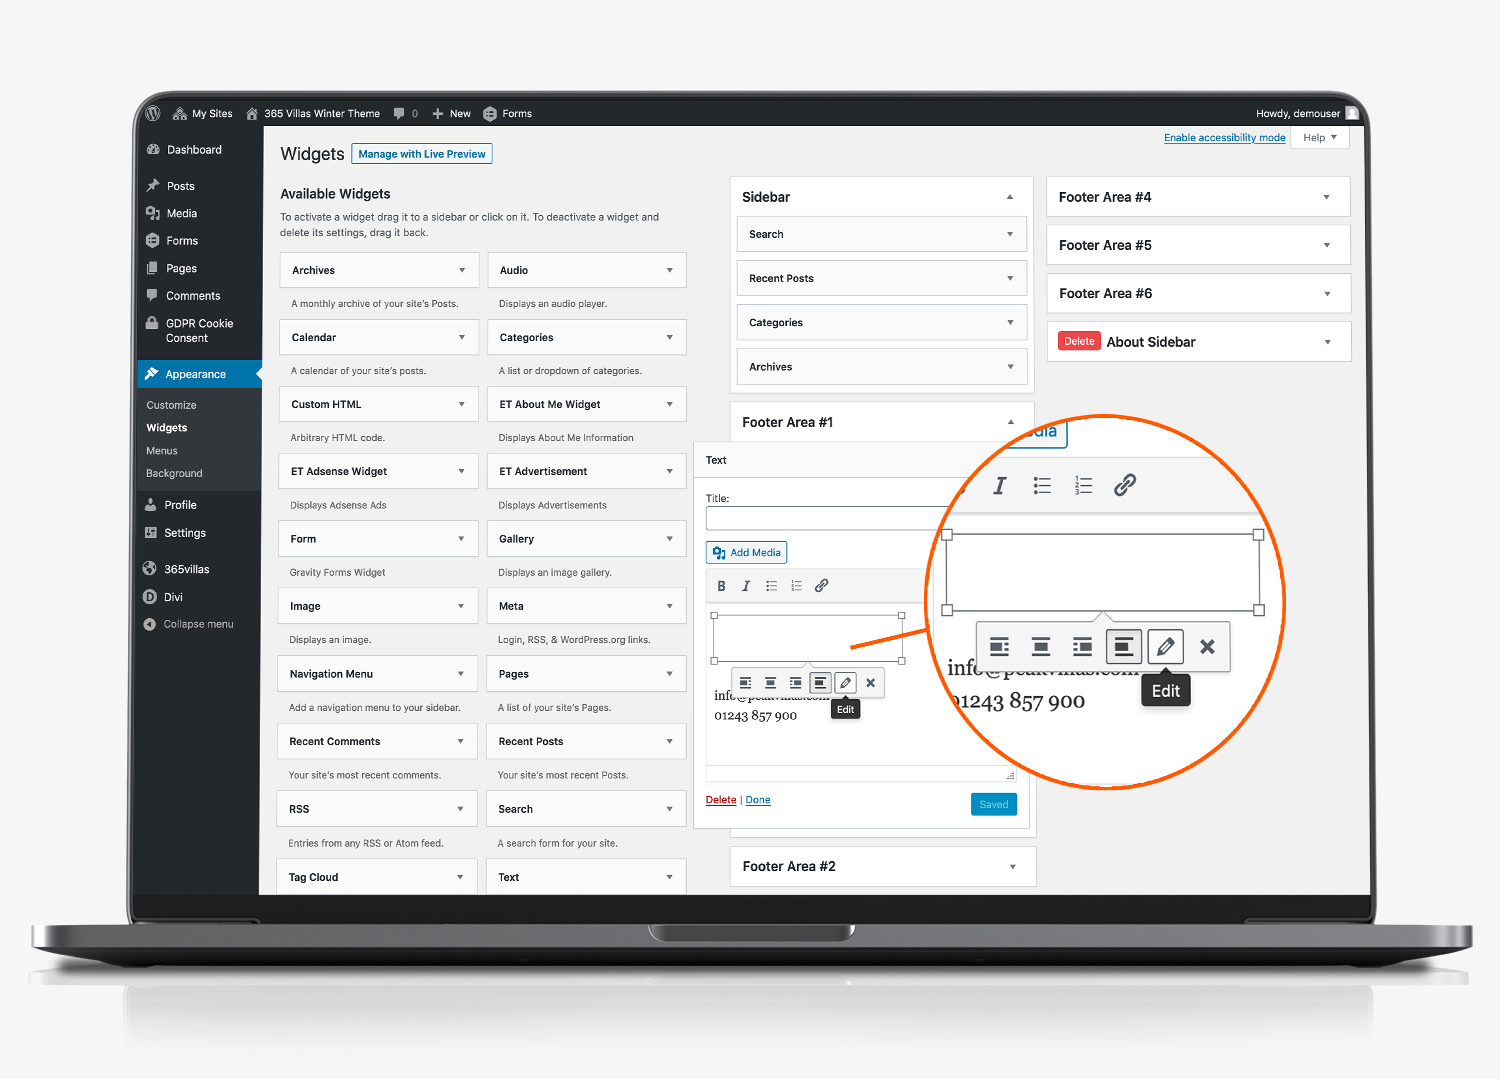
The footer logo is a transparent .png file and the logo itself is coloured white, so that it displays against the dark colour of the footer. Consequently, in the #1 footer section, the white logo is only visible when you click to highlight it!
Replace Logo Image
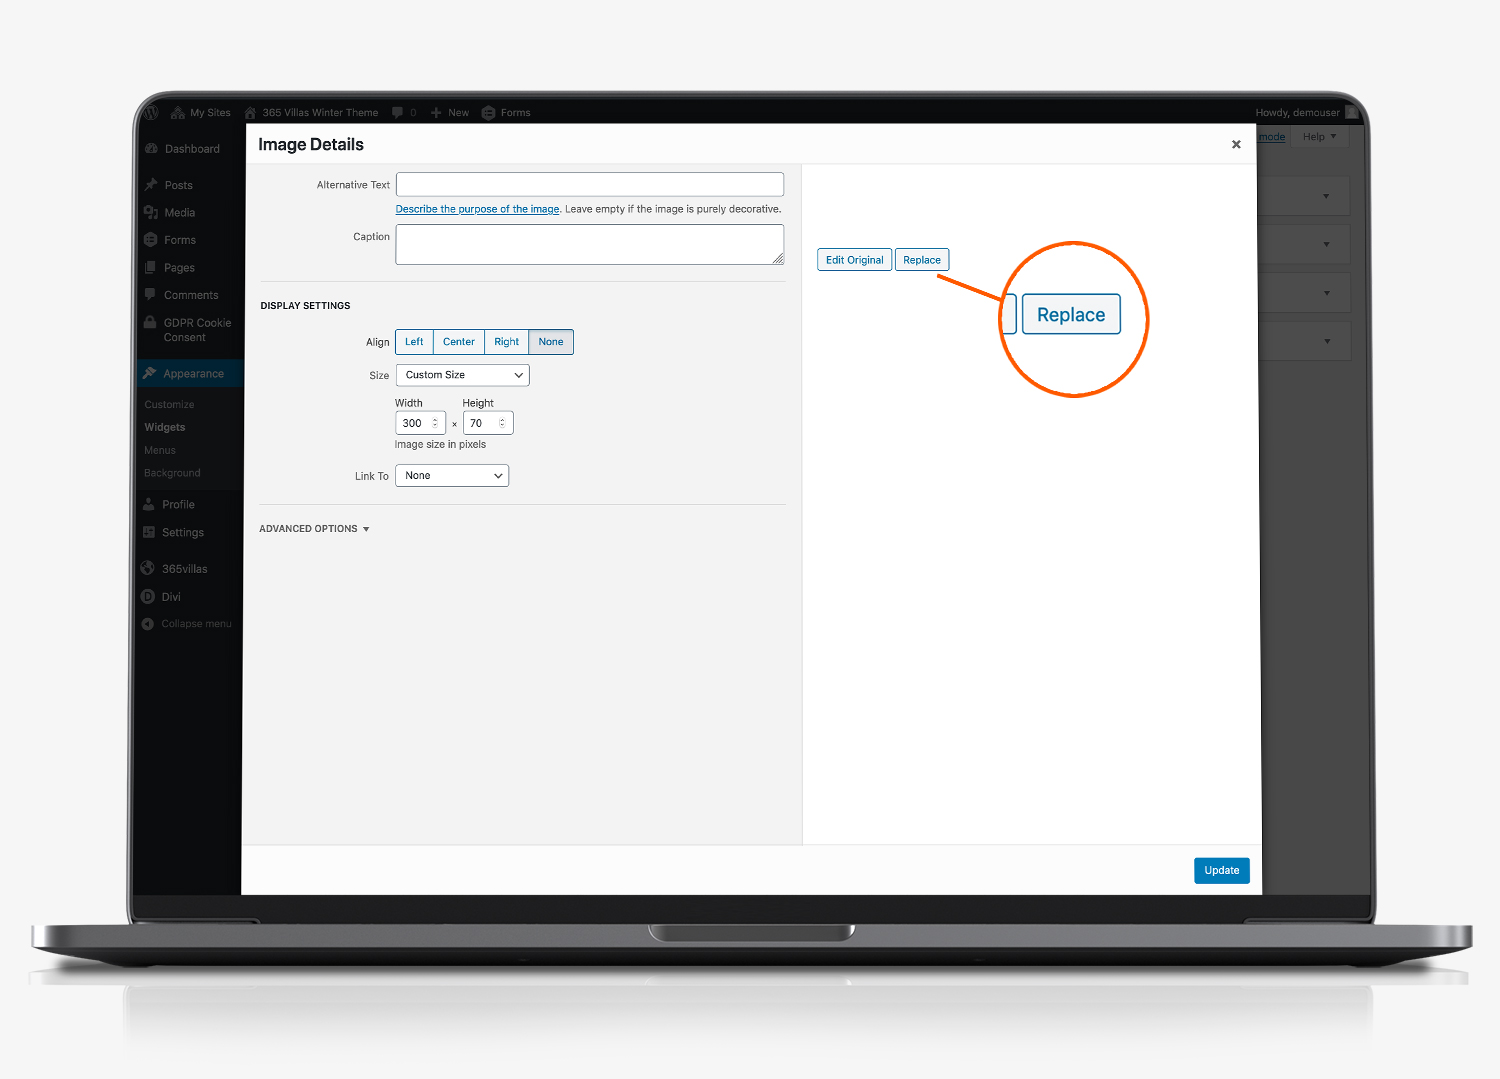
Click the pencil icon to edit / replace the default logo included within your website.
Select/Upload logo in Media Library
Clicking ‘replace’ brings up the media library for your website, where you can either select or upload your own transparent logo.
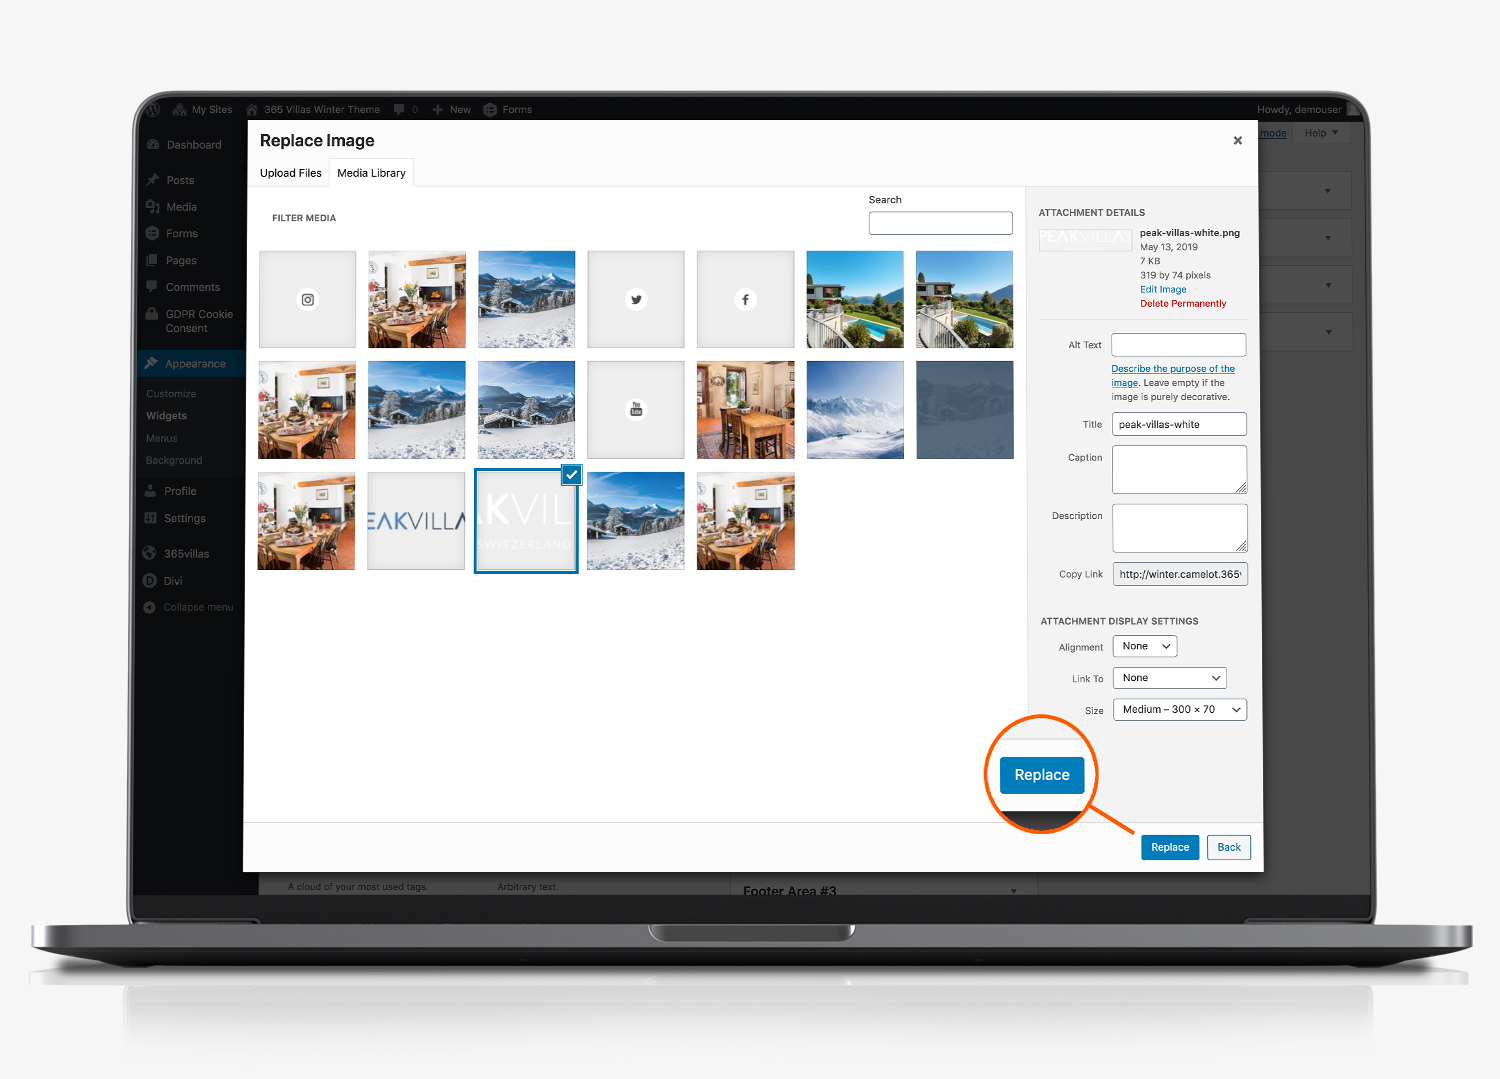
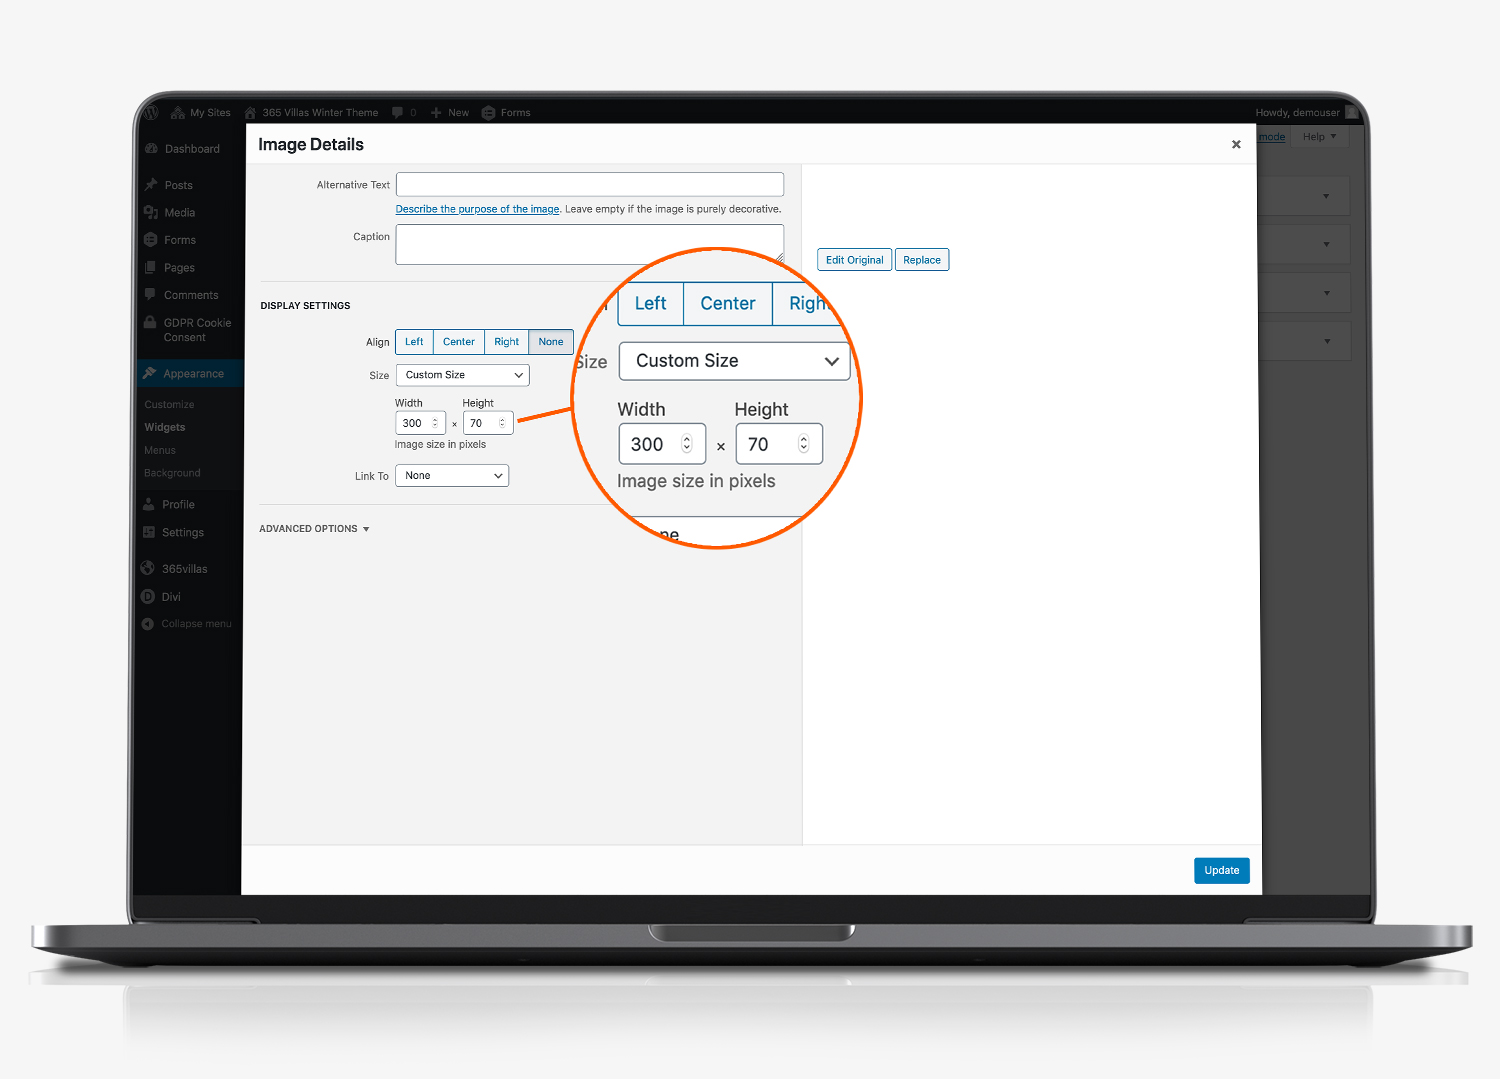
Image Rezize to 300px wide
We recommend that you resize your logo, so that it is a maximum of 300 pixels wide. You can either resize it using an external photo editor such as Pixlr. Or, you can use the basic editor included within WordPress. Under the image details tab, you can resize the image dimensions. Ensure the width is no more than 300 pixels.
Once you have replaced your logo, you can also edit the email address and telephone number in the widget editor. Click ‘save’ when you have finished editing.
Footer Area #2 and #3 (Menus)
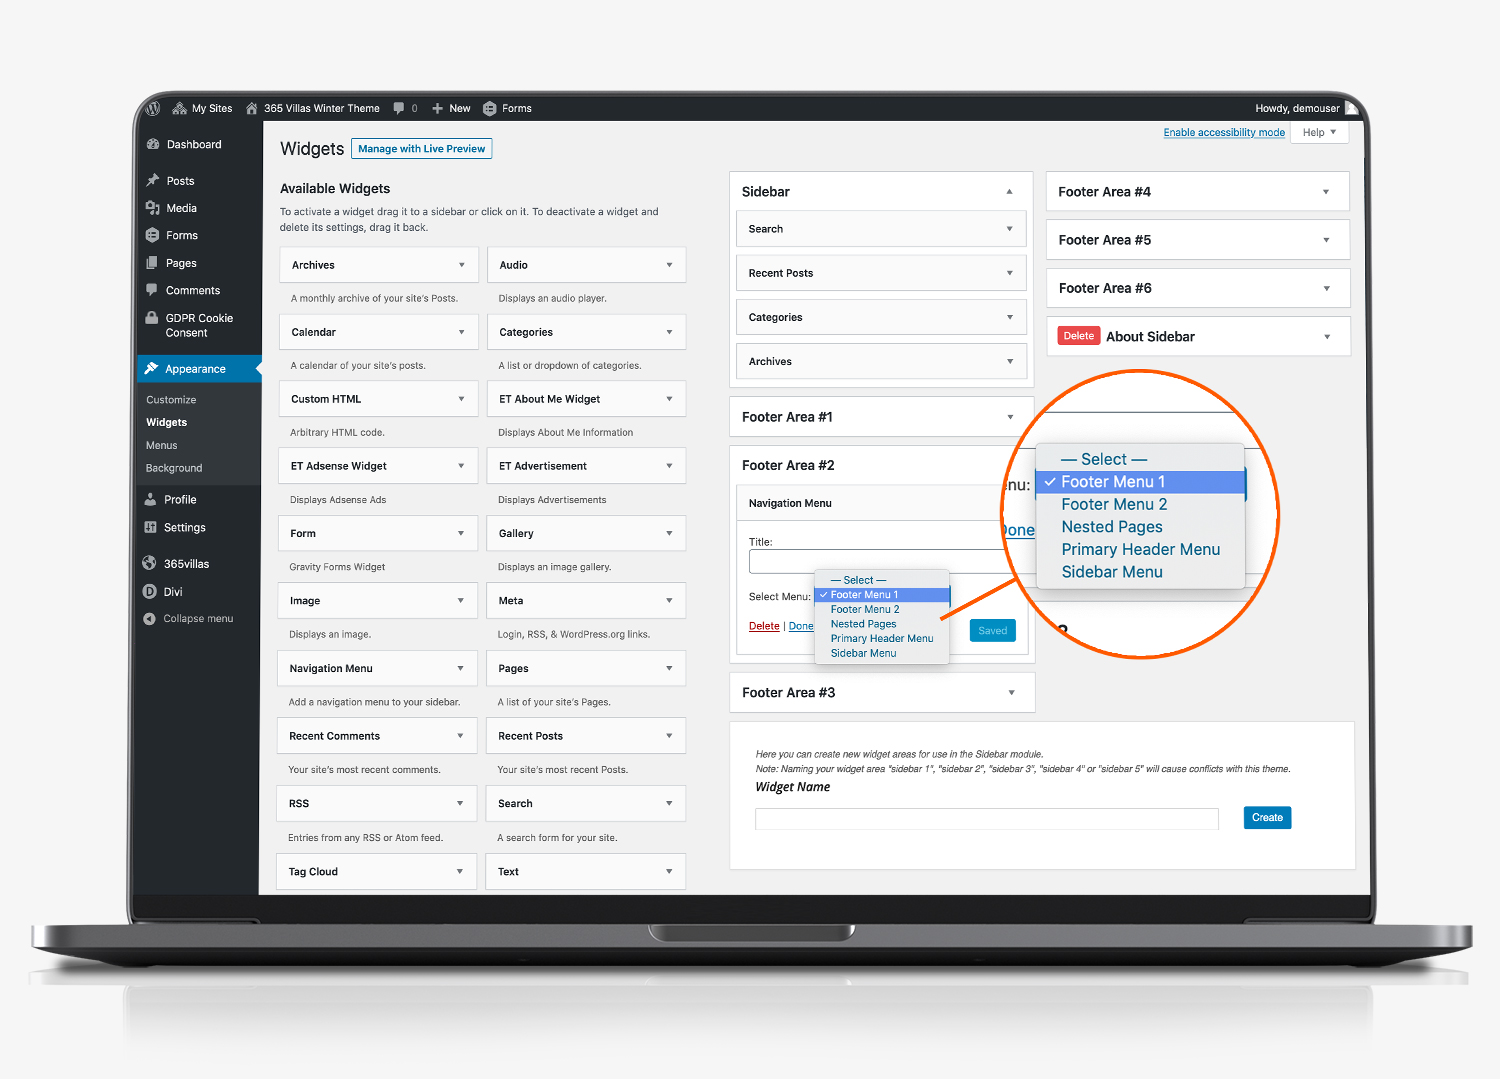
In the Footer Area 2 and 3 widgets, simply select, from the drop down list, the menu you want to display.
Select Footer Menu
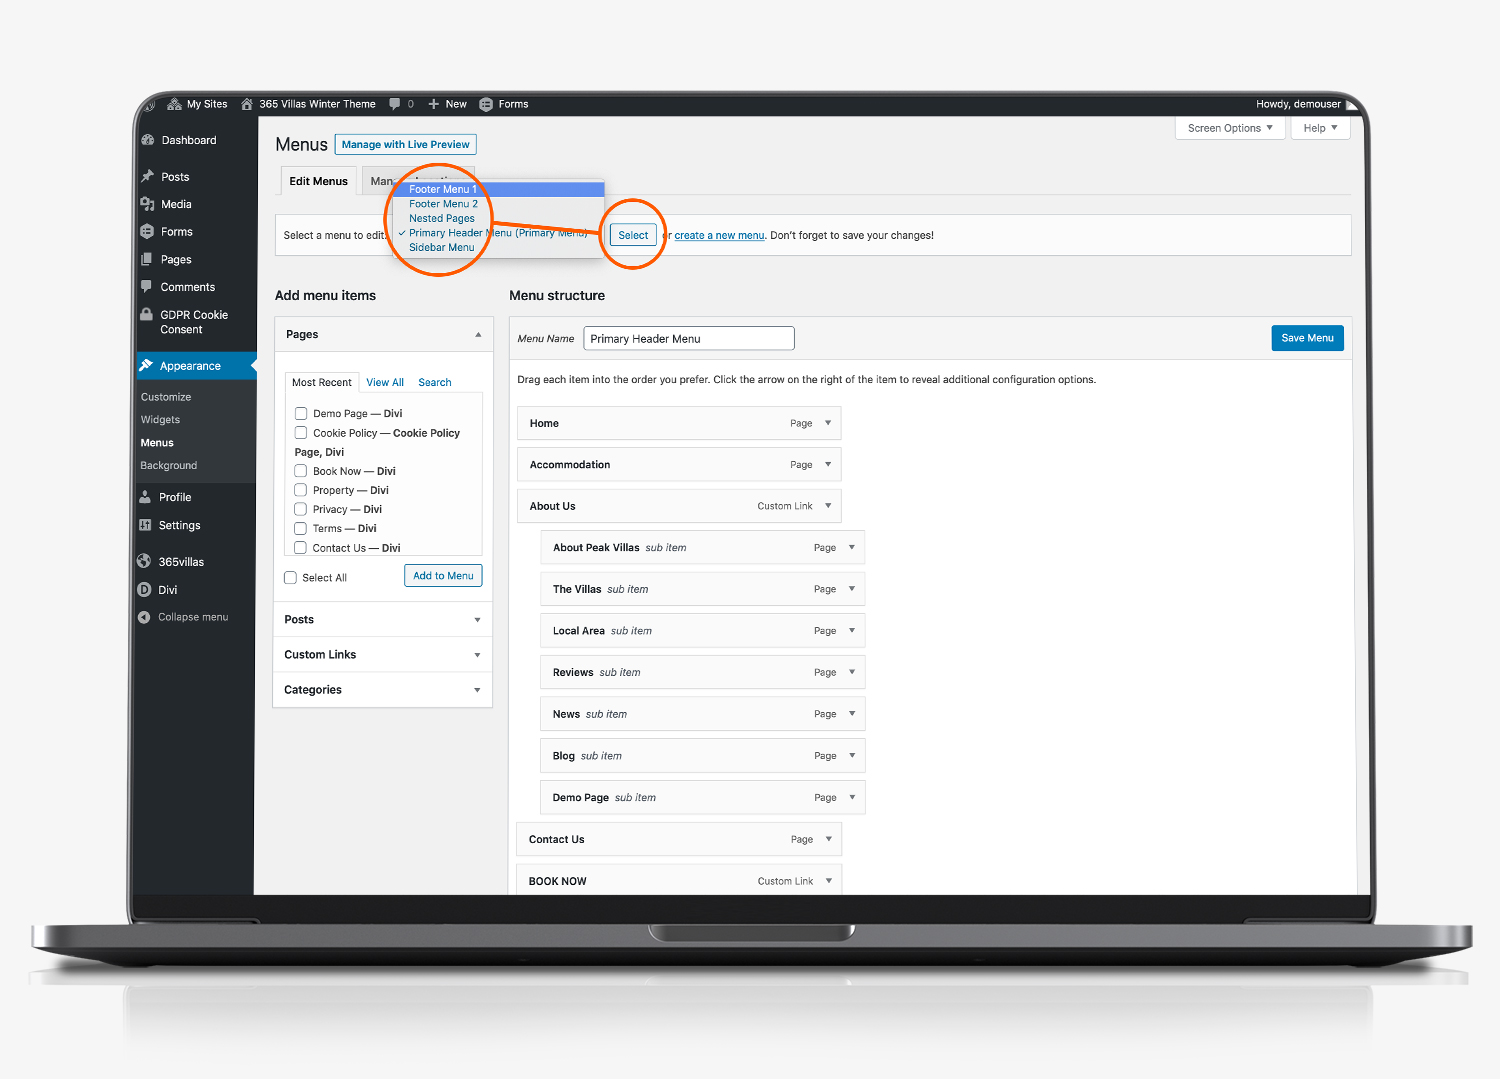
Click save if you make any changes.
Add Page to Menu
Under the appearance tab you can select menus, if you need to edit the pages that are included in the menu.
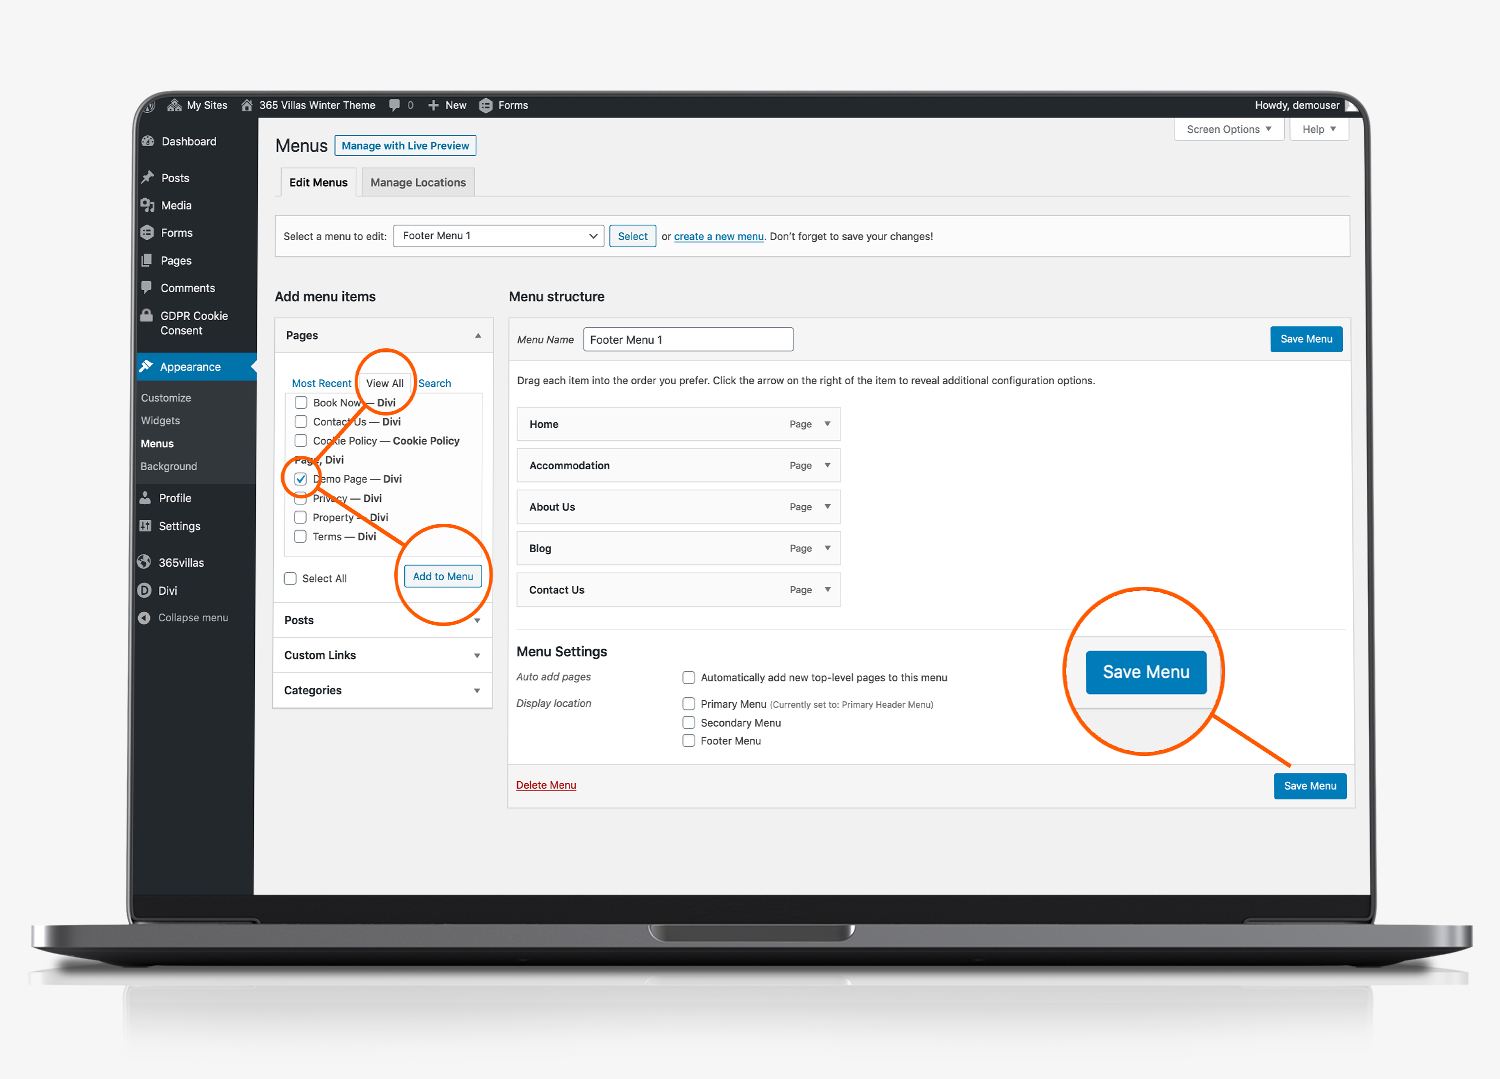
- If you have recently edited a page, it should display in the ‘most recent’ tab, in the list of available pages.
- If it doesn’t appear here, select the ‘view all’ tab
- Select the page you want to add to the menu by ticking the selection box next to the [ages you want to include
- Click ‘Add to menu’
Drag page to menu position
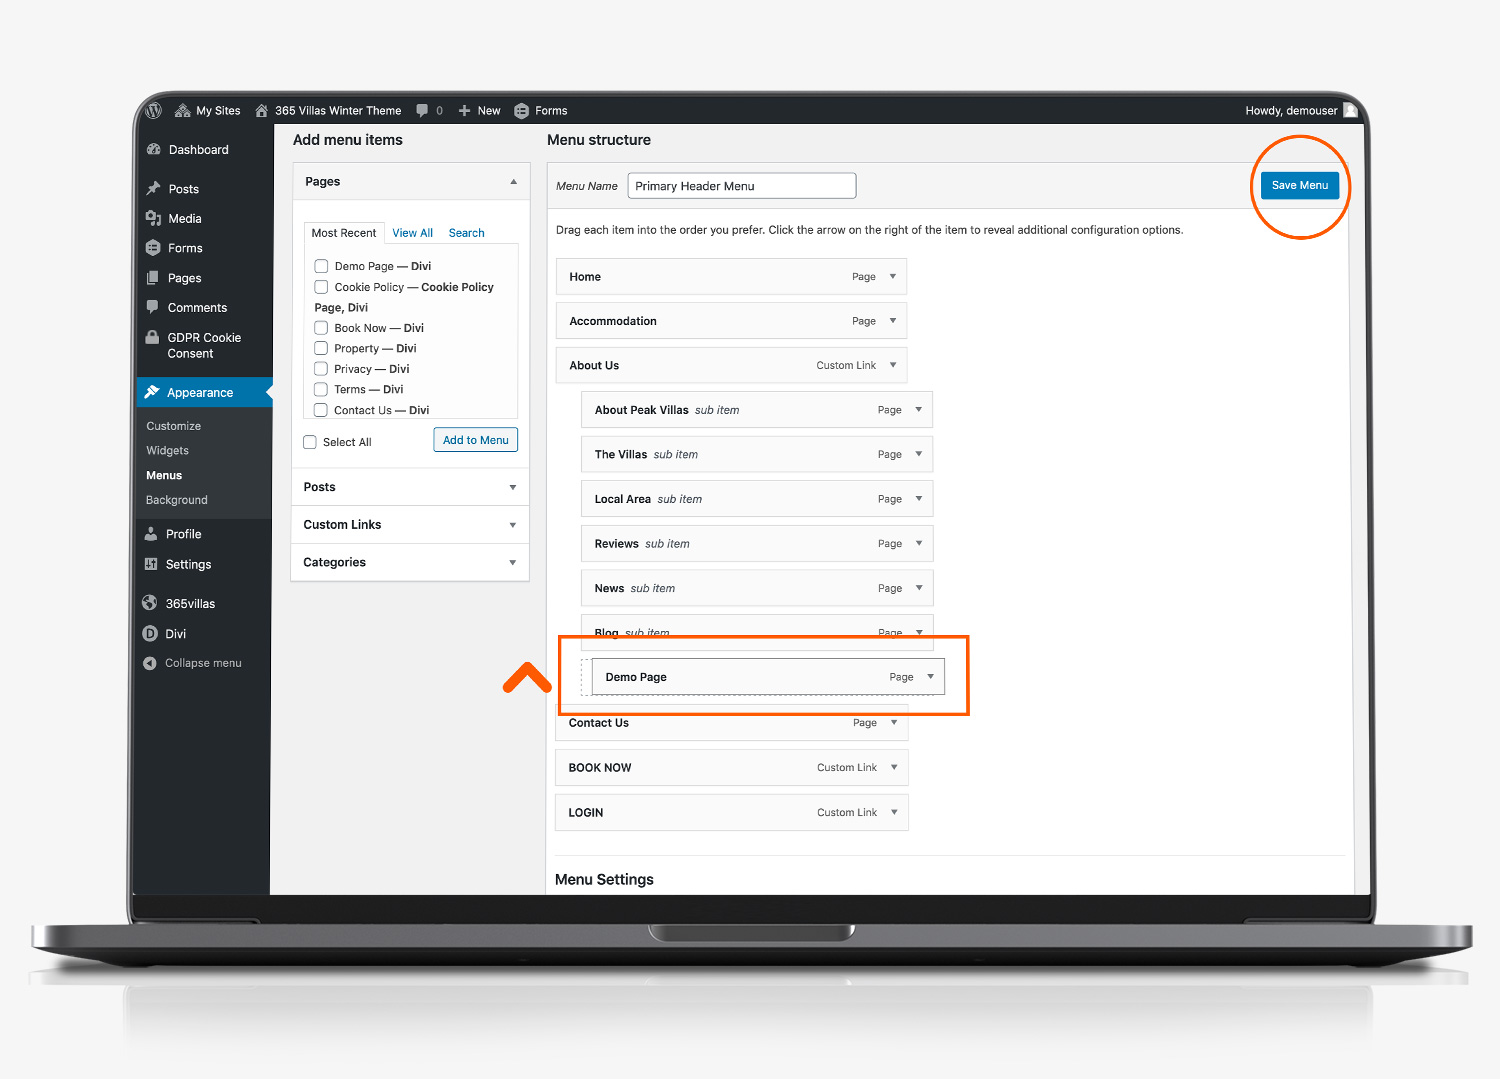
The page you have selected will appear at the bottom of the menu list in the main section of the page. Click the page (you will see the mouse control change to a cross) and you can drag and drop the page to where you want it to appear in the menu.
Be sure to click ‘save menu’ to commit the change.
Footer Area #4
Click the arrow to expand the footer area #4. By default we have included icons for Twitter, Facebook and Instagram.
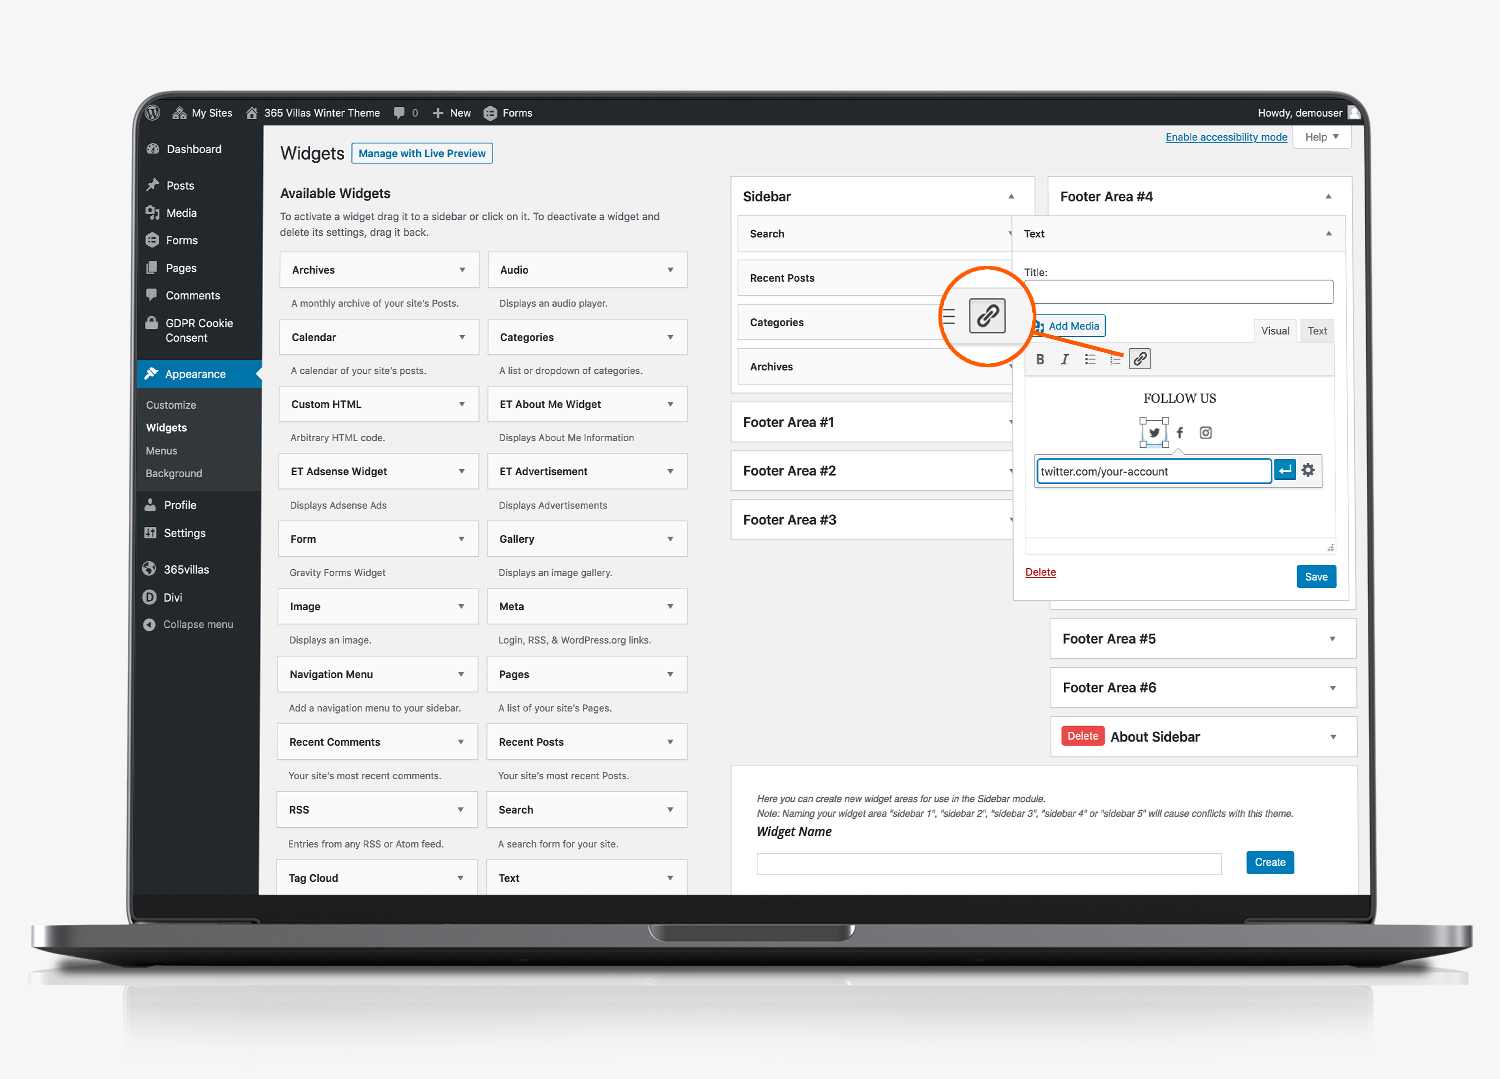
To edit the link to your Twitter, Facebook or Instagram network:
- Click the image
- Click the pencil ‘edit’ icon
- In the URL field, paste the full url to your selected social media network
- Click update
- This takes you back to the widgets section. Click ‘save’
Footer Background Colour
To change the footer navigation colour:
- Select appearance
- Select ‘customise’
- Select ‘footer’
- Select ‘Layout’
- Click ‘Footer Background Colour’ to change the background colour. The default is #3a3a3a. To find out more about HTML colours click here.
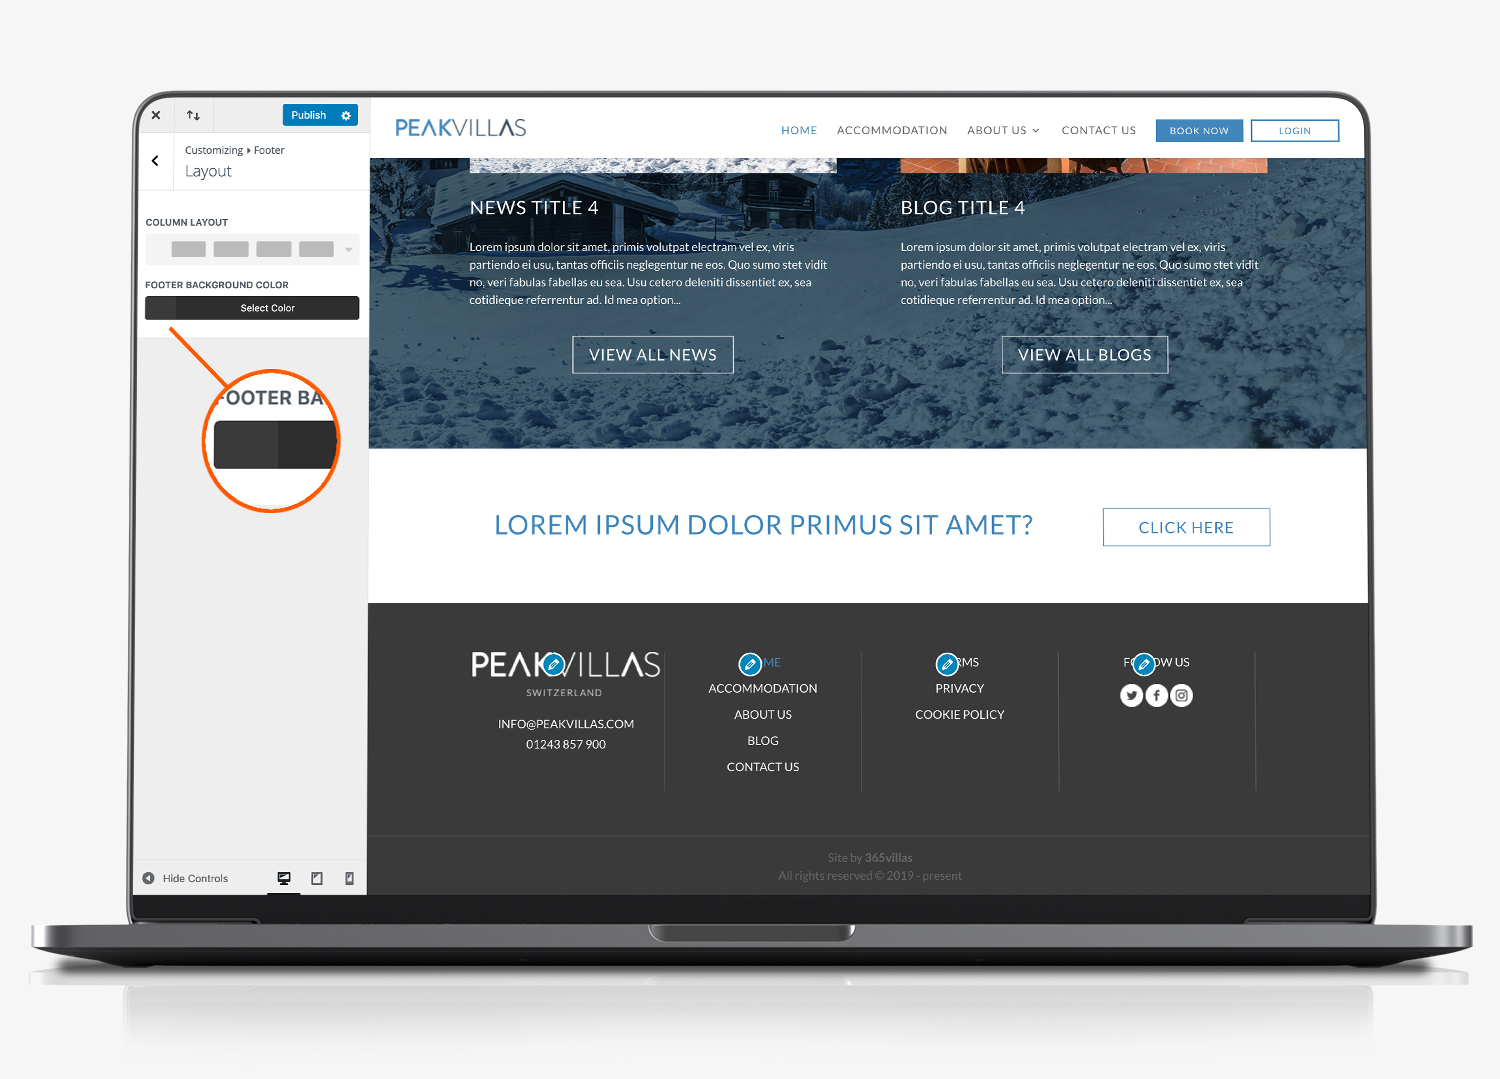
Bottom Footer Background
The very bottom section of the footer can also be coloured independently of the main footer.
- Select appearance
- Select ‘customise’
- Select ‘footer’
- Select ‘Bottom Bar’
- Click ‘Background Colour’ to change the bottom bar background colour. The default is #3a3a3a (the same as the main footer section). You can change the colour here, if you wish to. To find out more about HTML colours click here.
