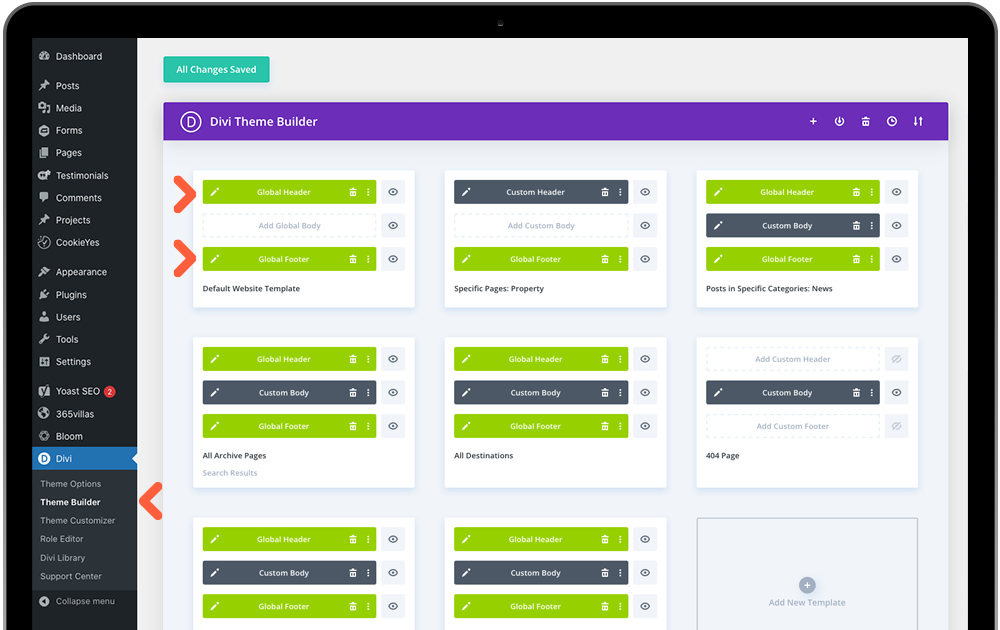
The Divi Theme Builder is where Sierra site-wide templates have been created, including the header and footer. Go to Divi Menu > Theme Builder.
The first container stores the templates that are used as default on every webpage – we call this our global template. Click the edit icon on either the green global header or footer bars to open the Divi Visual Builder.
Tip: Open the Wireframe View via the grid icon in the bottom Visual Builder Menu (see below). Sierra header menu is transparent so we can not see a visual preview here.

Global Header
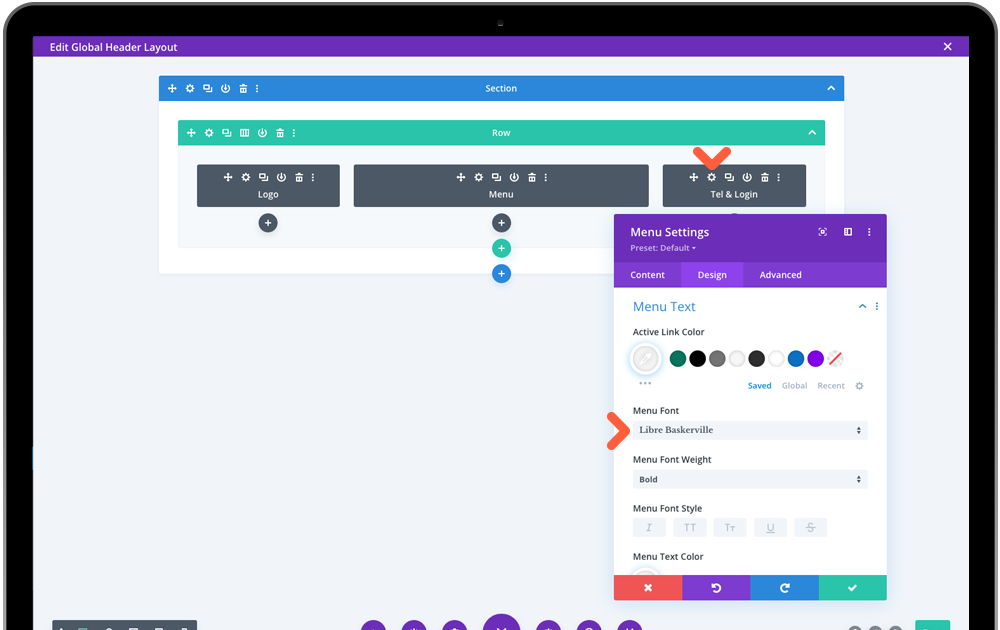
The header has already had the logo and button formatted from previous steps, so all that is left to do here, should you want to, is change the font of the menu to either your header or parargraph font Design > Menu Text > Menu Font.
Save the page via the bottom page menu then click the top X to close the Divi builder.
Changing Header Button Colours
The text and icon in your menu Call button will adopt the same colour as your other menu links. If you wish to colour these differently, we need to apply custom css in the WP Customizer. Yhe same applies to the button colour, as we are styling a menu link rather than a button module. See end of WordPress Customizer article.
Global Footer
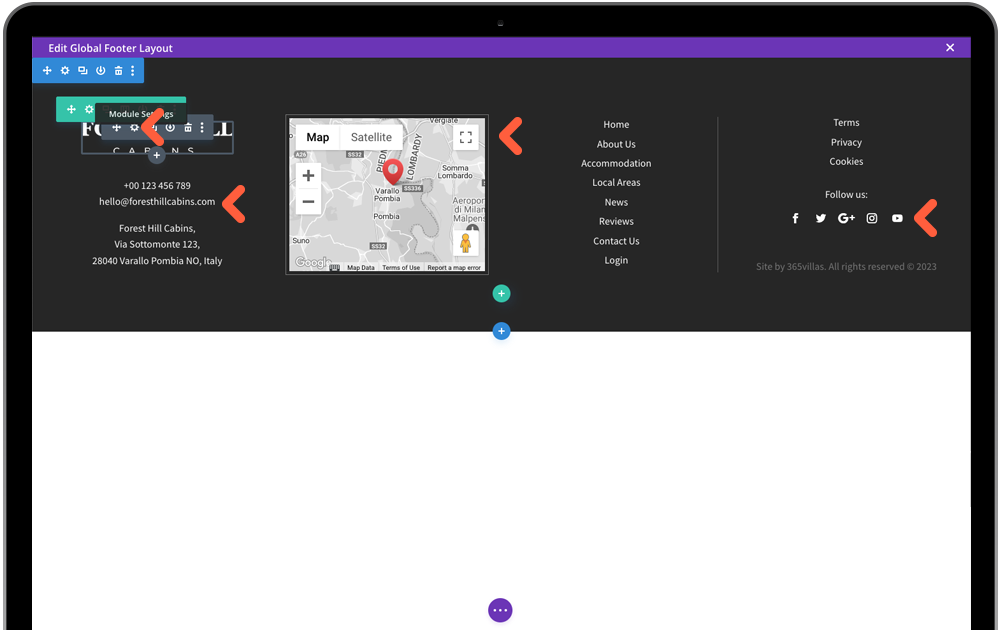
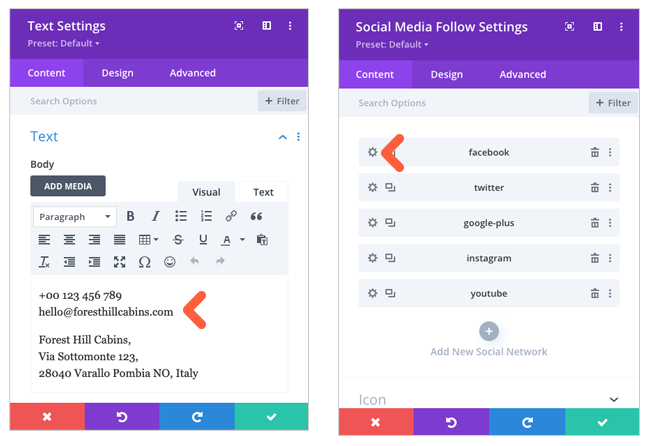
Enter the global footer via the Edit icon where you will make a few small edits to your company information, map and social media links. The footer logo is also connected to the Site logo settings but if you have changed the footer background color and need a new version of the logo to stand out, you can change this via the module settings. Make your way through each grey module editing Logo, Tel, Email, Address and Social Media using the module instructions in Creating Page Content. The Menu structure is also controlled in WordPress CMS (covered later in the tutorial), should you need to.
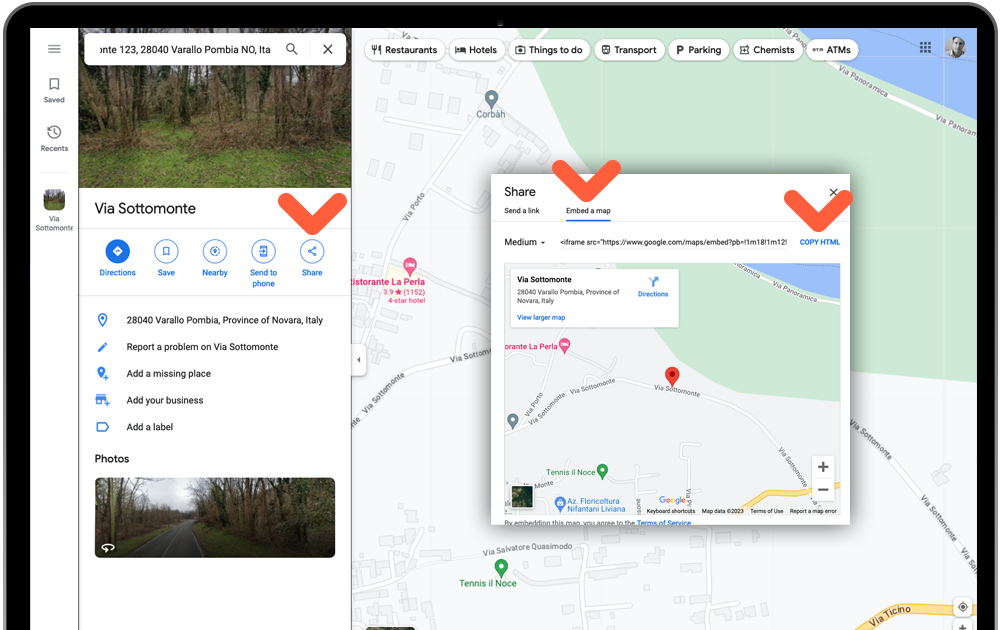
For the footer map you will need to insert an embedded map from google maps rather than using the Divi map module. This is becuase the footer appears on every page of the website and the google map api cannot be used for 2 instances on the same page when it is also needed, for example,on individual property listings. To insert an embedded map, visit Google Maps and insert your address. Click ‘Share’, in the popup select ‘Embed a map’ tab and then ‘COPY HTML’.
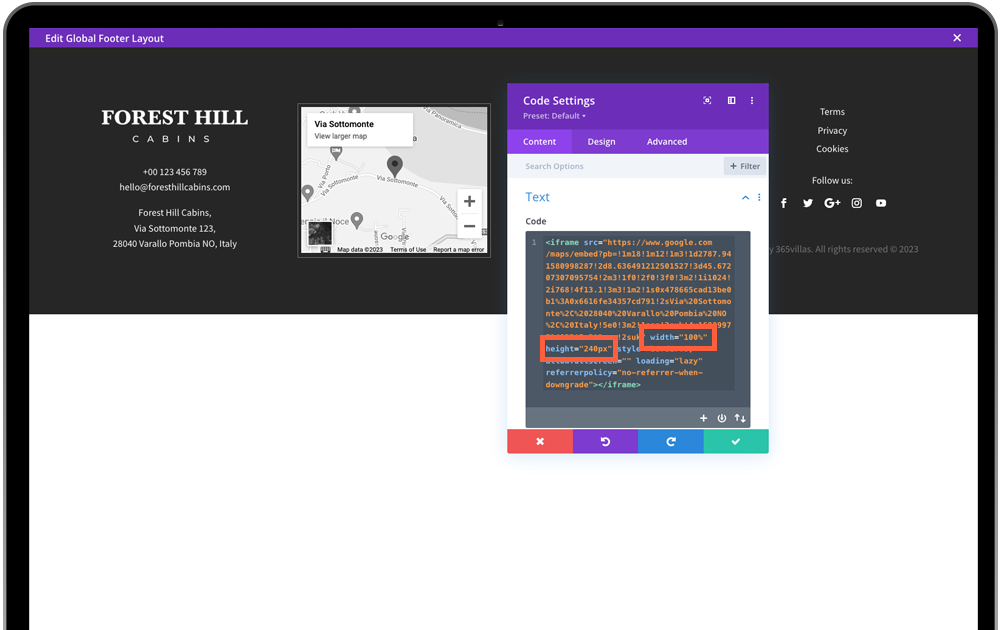
Paste the HTML in to your code module. Two of the default dimensions will need updating in the code for the width (to 100%) and the height (to 240px). Save changes to the footer layout.
